Join the journey of a longtime gamer who has put the hobby on hold for over 20 years as he moves from the pure modelling aspect of the game to the actual purpose of playing the game. Content will focus on, but is not limited to, Battlefront's "Flames of War," and whatever else might spark my interest.
Saturday, October 20, 2012
Making a Display Board
Had a team tourney recently and I need a good carrying board to hold my troops that I was going to use for the tournament....and I needed to make it look good to enhance my troops for the painting competition.
Why did I need the board? The main reason was to speed up play. By having the troops I would need for the tourney out...for the entire tournament...I don't have to keep digging into my carrying case, taking out the foam trays to get to all the troops I would need...slowing down each games' setup. This also saves valuable space in and around the table.
Now, I could have just gone with a simple plastic storage bin lid or something similar...cheap and effective...but not that pretty. Making the board a display board with terrain really makes the unit POP!
So, how to do this…
Materials:
- 17"x 23" Cork Bulletin Board with wood sides
- Spackle
- Corrugated cardboard pieces
- Vallejo Pumice
- Golden Pumice
- Loose Gravel
- Woodland Scenics Fine Flock (different colors)
- Woodland Scenics Coarse Flock (different colors)
- Woodland Scenics Clump Foliage (different colors)
- Woodland Scenics Ballast (very fine/small rocks)
- Silfor tufts (4mm and 6mm)
- Army Painter Meadow Flowers
- Matte Medium/Flock sealant
- Elmer's Glue
- Hot Glue Gun
- Cheap Acrylic Craft Paints (Americana series)
- Spray Can Gloss Varnish
- Spray Can Black Lacquer
- Sandpaper
Step 1 Have a vision
- To make the board look realistic, you have to have a vision. Inspiration can come from many sources...look at pictures, really good game tables with lots of terrain, etc...
- Now, take that overall and pick a section that will fit your board area
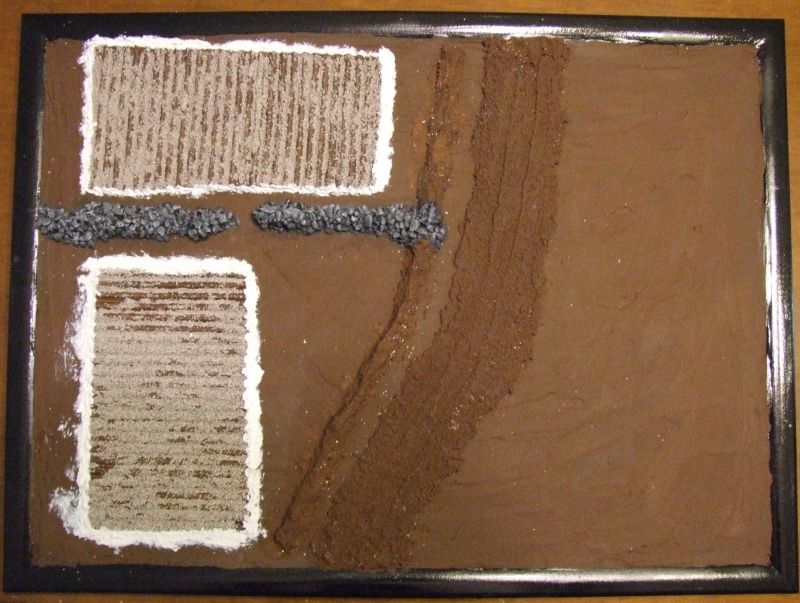
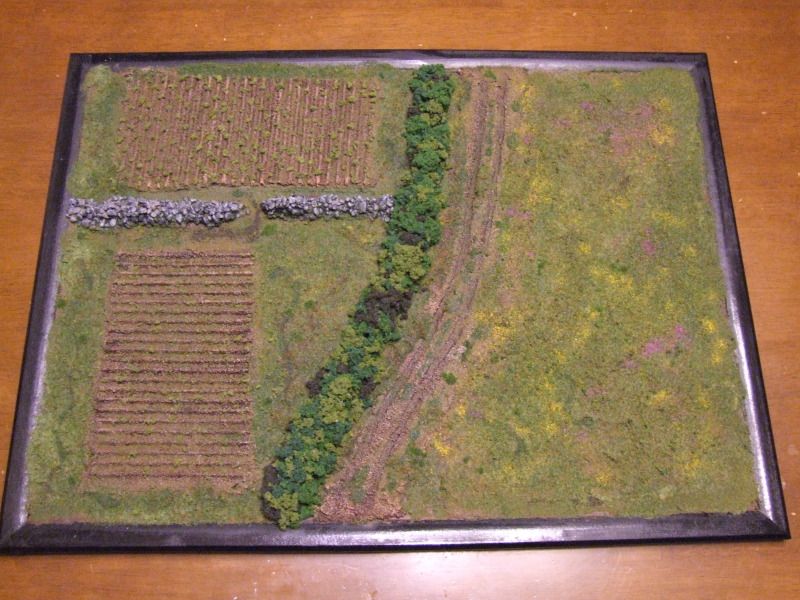
- I wanted to have a road with a hedgerow on the side separating the road from some fields that were separated by a stone wall. The other side of the road was to be an open field. This was mainly to allow me to try multiple terrain building techniques I have been waiting to try...Thanks to Sean Morris (The Terrain Guy) for giving me the bug ;-)
Step 2 Have a plan
- You have to have a plan..otherwise you will waste time repeating things as you have to fix areas messed up by doing a step "out of order."
- My advice...build up and out
- Build the lower levels first and build upon that foundation
- Build from the center and then out
- With that vision in mind, break components down into levels and sections to facilitate the "build up and out."
- Write the plan down as a blue print! If you keep it all in your head you are bound to forget something and miss a step and have to repeat steps to add it back in.
- As you build, use models of the appropriate size to make sure your scale is correct. Nothing worse than building a board for 15mm and things are sized too big or too small. That disparity works against you and diminishes the excellence of your paint job you built the board to enhance in the first place.
Step 3 Seal the Board
- I choose a cork board because it was cheap ($5). You could choose a dry erase board but they are more expensive (at least 2-3 times more). If you did choose a dry erase board I would "rough up" the surface first with sandpaper and steel wool to help the materials adhere better then follow the rest of the steps for sealing below.
- You will be dealing with a lot of materials that are wet when you apply them. To make sure the cork and cardboard of the bulletin don't lose their integrity you should protect them from water. Here is where the gloss varnish and black lacquer comes in handy.
- I didn't think the pale wood color of the bulletin board fit the image I wanted to display for the board so I sprayed the edges a nice black lacquer to give it nice look and to set off the terrain in the middle.
- Next spray the entire board (the edges, the front and the back) with gloss varnish. This will give a nice surface for the all the terrain to adhere to and protect the cork from moisture during the build process.
Step 4 Let there be... ground!
- Take your Spackle and spread it out over the board. This is the base ground level from which everything will be built. You can add textures here and there to give the ground "life" and make it look more realistic...you don't want it totally smooth.
- Be careful not to get it on your freshly painted black frame. If you do, simply wipe it away with a damp cloth. The extra gloss varnish you used on the frame helps protect it from little “accidents” like this.
- Now sand the Spackle down to knock down those nasty ripples or "overhang" spikes that tend to form when you add Spackle to the board. Again, you don't want to make it perfectly smooth...leave little raises and dips.
Step 5 On the Road again.....Add the road
- The road I wanted bisects the board, so following the "build up and out" we need to start with the road in the center
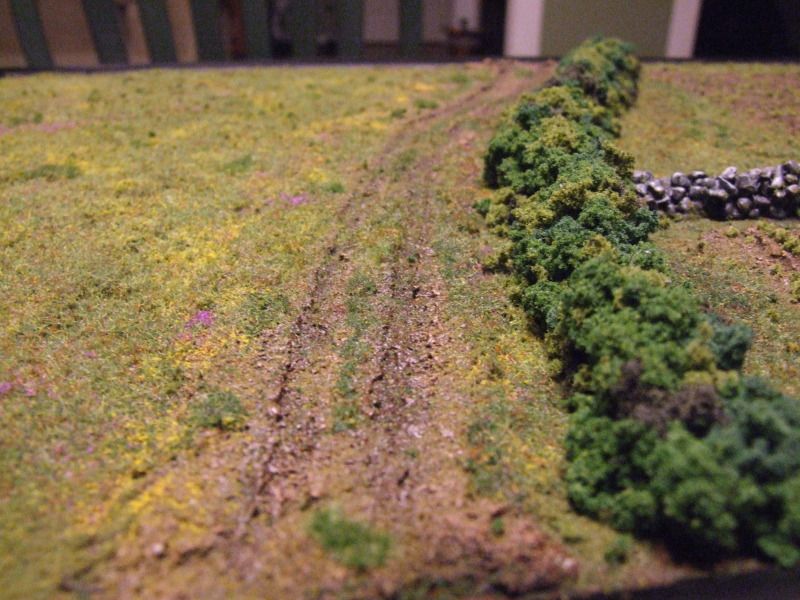
- Here I used a mix of the Golden Artist Pumice and Vallejo's White Pumice to get a nice gritty rough goo...spread this out in the shape of the road. The bend in the road is to add a little character.
- Next, to make this look like a road you need to add tire tracks. This road is just a little larger a one lane road and a little smaller than a 2 lane road, so I added 3 paths for the tires (one vehicle gets a little out of the way). To make these just take the end of a paint brush and drag it along the path where the tires would travel. Make sure you take the excess off of the paintbrush as it builds up. Use a model to verify the wide of the tracks. If you are off....just smooth the road back out and do it again.
Step 6 Add the Height
- I said that I wanted some hedges and a wall. To build these and add a little vertical dimension to the board I used Spackle again.
- This time instead of flattening the Spackle out, I left it in a rough mound shape where I wanted the hedge and wall to be placed. This mound will the base where I will add the clump foliage for the hedge and rocks for the stone wall.
Step 7 Add the fields
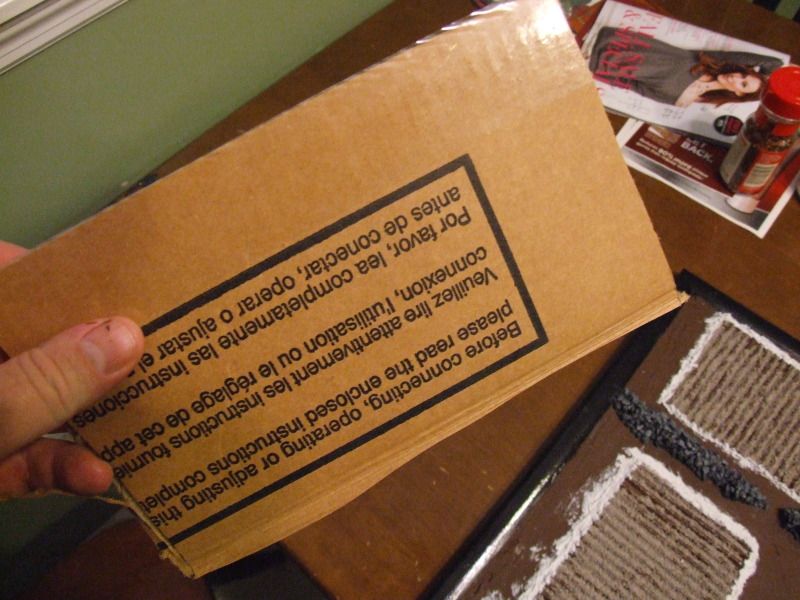
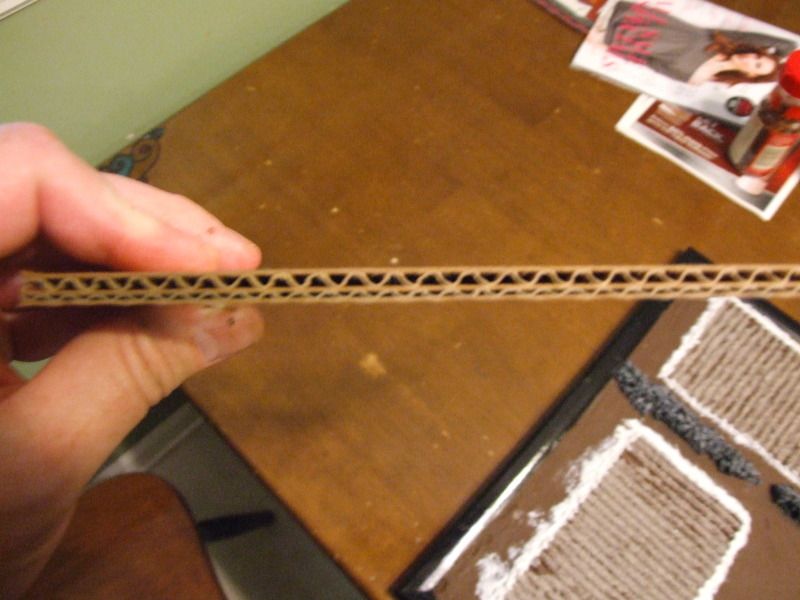
- Plowed fields have nice rows....just like corrugated cardboard.
- Cut the cardboard into the shapes you want
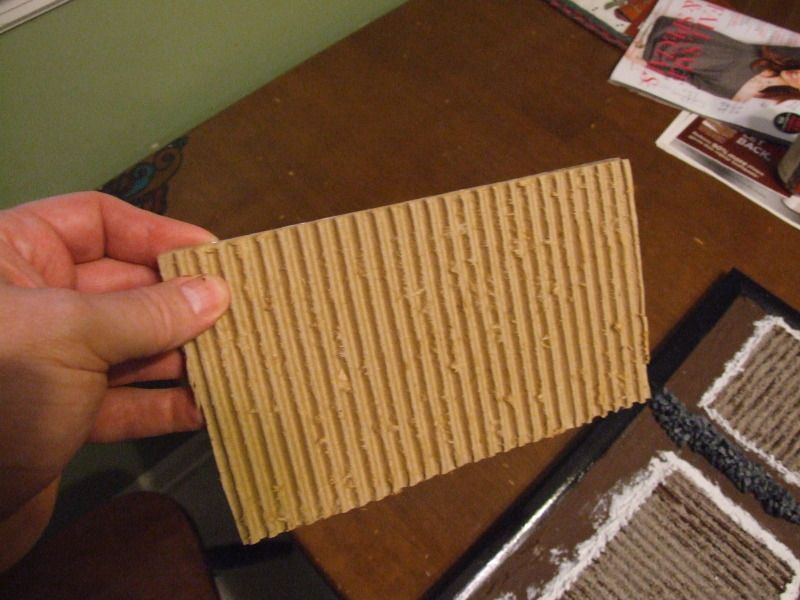
- Take your cardboard and CAREFULLY peel one side of the backing off, leaving the nice bumpy rows.
- Peel off the nasty little pieces of cardboard that like to stay stuck and make it look as clean as possible.
- Paint BOTH sides of the card board with acrylic paint. It is important to do both sides. This will minimize any warping the cardboard will do as the paint dries.
Step 8 Plow the fields
- The plain cardboard is a little too smooth and doesn't look like dirt
- Spread a thin coat of PVA glue across the cardboard.
- Sprinkle the Ballast on the fields. You could use Pumice, but the Ballast is mucgh cheaper.
- Shake off the excess
- Now we have the dirty texture to look like loose earth
- After the glue dries, glue the cardboard pieces into place with Elmer's (PVA) glue.
- Use pumice to blend the cardboard into the rest of the board and go around all the edges taking special care to cover up the "tunnels" where each row opens up.
Step 9 Add Color.
- Use your craft paint and paint the ground, road and fields using whatever color scheme you want
- Start with Americana Dark Chocolate
- Then I used a black wash to add depth
- Finally, I used Americana Sable Brown as a highlight and Vallejo USA Tan Earth as a "Super Highlight."
Step 10 Get the Flock outta here....
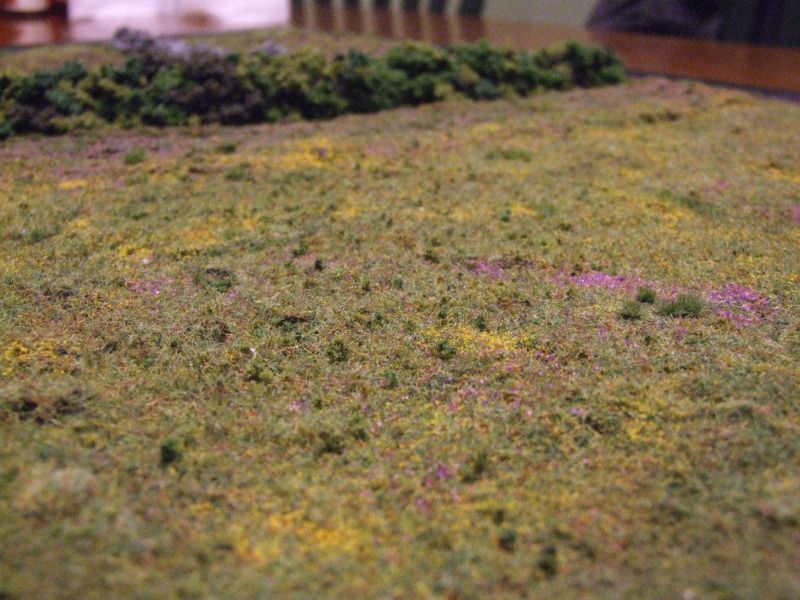
- Add your flock to where ever you want grassy fields. I used my 3 level flock process (Soil, Turf, Grass).
- Doing this now, allows you shake off excess without getting flock all mixed up on your walls and hedges (I had built my wall prior and had some cleanup to do taking flock off of the rocks)
- Seal each layer with matte medium
- I also wanted to try out some flowers in the open field and used the Woodland Scenics Flowers. This looks like Steel Wool with colored specks on it. You are supposed to pull it and spread it out on the board. It just didn't look right doing it that way. The "specks" flake off very easy in the bag the flowers come in. I ended up collecting as much of the specks as I could (helping the process where I could by knocking off as much as possible) and then just sprinkled the flowers where I thought they would be....along the hedges and road and in patches in the meadow.
Step 11 I wanna rock!!!!
- Add PVA glue over the Spackle mound base where the wall is. Put it on rather heavy, but not to the point where it is running over the surrounding area.
- Build the wall by add the rocks over the glue.
- When the glue has dry add more Matte medium to seal the in place.
- When the Matte medium is dry, paint them. I used American Lamp Black (Ebony) as a base, then American Neutral Gray, a heavy black wash, followed by a mix of the American Neutral Grey and Vallejo 989 Sky Grey and finally the 989 Sky Grey by itself.
- Apply varnish (Gloss and then matte) with a brush; being careful not to drip on the flocked surface.
Step 12 Bring us…a Shrubbery!
- Ni...Ni...NiNi Ni
- Now is the time for the Hot Glue Gun. Get a little bowl or dish and pour out a mix of the 3 clump foliage colors (Light/Medium/Dark Green).
- Break the clumps down into pieces no bigger than you thumbnail.
- Apply a bead of hot glue about 2-3" long along the outer bottom of the Hedge base
- Pick some clump foliage from your mix at random and apply to the glue. Press the clumps into the glue and hold for a few seconds. You need to be quick and apply the foliage before the glue dries, and careful enough not to burn yourself.
- Continue with the glue and foliage along on base and when you reach the end repeat the process on the other side of the hedge at the base.
- When both sides have been completed; repeat the process on the top.
- If you have any gaps in coverage...plug them. If you use the Hot Glue Gun be careful of creating "strings/webs." I used PVA glue to plug the few holes I had with clump foliage…didn’t want to risk hot glue “strings” getting over the surrounding clumps.
- Once all the glue is dry, SOAK and I mean SOAK all the clump foliage with Matte Medium. When dry it will protect the foliage from flaking off.
Step 13 Plant Your Field
- 2 ways to plant your crops.
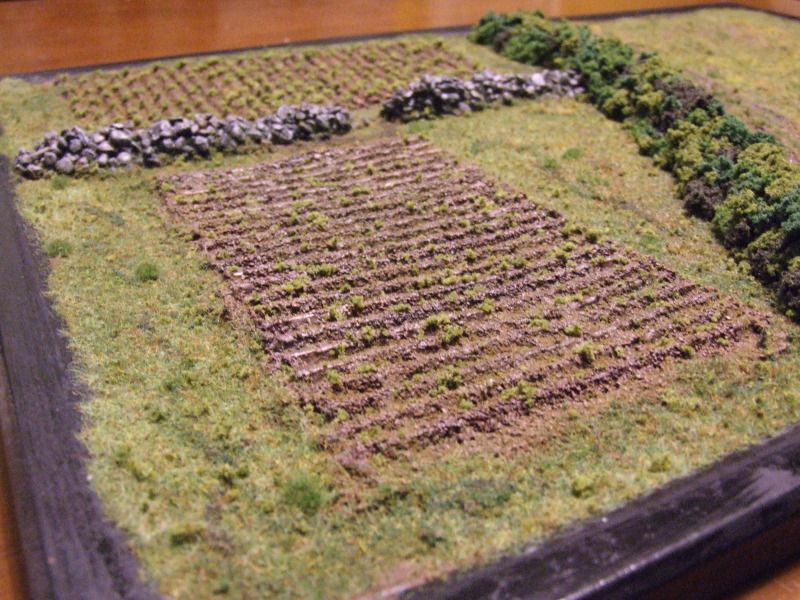
- Fuller mature veggies (like in the picture above)
- Take scrap pieces of your clump foliage or coarse flock and glue to the top of each row in a checkerboard fashion
- Very time consuming but gives a nice look of a lettuce or broccoli patch
- For crops just coming out of the ground (above)
- Glue random dots of PVA glue on the tops of the rows
- Sprinkle scraps of clump foliage or coarse flock over the piece
- Press everything down. You can use your hand or a scrap piece of cardboard to assist
- When dry, shake of excess, clean out the valleys of any flock and trim any excess off with scissors
- This is a little quicker, but gives a very haphazard look.
- Apply a coat of Matte MEdium making sure the veggies get good and wet.
There you go.
The board looked great...did great at the tournament and helped me and my partner get the highest Best Painted Army scores. In total, it took about a week...working on it off and on for about 30-60 minutes a shot each day. Honest Luke and Steve…it was only during times something was drying on the commission jobs I am doing for you :-). The best part is that out of pocket costs were roughly $25 I used a lot of items I had laying around for the basing of my miniatures anyways (flock, foliage, Pumice, paint, etc...). The biggest cost items where the bulletin board itself, the Matte Medium, and the Spackle.
I am trying to fiddle with the board and figure how I can best add some storage underneath. This way I can have my rulebook and Army list and templates all right at hand and don’t have to have them scattered around (or heaven forbid on the actual game table!). I have a few ideas…just have to play with how to strengthen the board in the middle.
More to follow as it develops!
Have you made a display board...do you use them? As Ferris Bueller said "It is so choice. If you have the means, I highly recommend picking one up."
Subscribe to:
Comments (Atom)

