Friday, February 8, 2013

Treelines


As part of the preparation for the Frontal Assault Tournment in Huntsville, Alabama on 16 Feb 13, I had to make 24 feet of treelines. Not to self...when designing tables be aware of what you are signing up for if you have to buy/make terrain.

To steal a line from Oddball from Kelly's Heroes as he was trying ot get some bridging support....."24 feet of treeline...I can get that anywhere."

Well, reality hit me.  24 feet of treeline...how to do this.

Well, to give a little flexibility it would be nice to have 6 inch long sections. 

Now I have to build at least 48 sections to meet the requirement.  GULP!!!!

First it would be nice to know what treelines actually look like.  In Europe, you find these along many roads and rivers:

http://www.f1online.de/premid/002073000/2073047.jpg

Ok, so we have tall skinny trees in a line.  Having a stick with clump foilage stuck to it and trimmed to shape  would work.  Now I am cheap...what is about the cheapest stick you can find?

Q-tips is what I came up with...and I only needed part of a $3 box!  I used the cardboard stick ones, not the plastic ones.  I found the plastic ones too flimsy.  you would be surprised at how strong theses paper sticks are.  Just cut the ends with cotton off of both ends and keep the middle piece.  Peel off as much of the cotton that might still be on the stick as you can.

Now we need a base for the trees to sit.  I had some Basswood and Birch boards laying around from another project. I then cut them into 6 in x 1 in lengths.  I ended up with 52 bases.  Always good to have a few extra.  The birch wood is thinner and looks better IMHO.

Next, I used hot glue to affix the sticks to the bases.  4 sticks per base, evenly spaced gives a nice impression of the treelines in the picture above. The little mound of glue at the bottom might look a little wierd right now, but wait till it gets painted.


Next step is to begin to landscape the base.  You could use pumice, but that is too expensive.  Sand or Woodland Scenics Ballast is a good solution.  Glue the sand/ballast down and once dry paint the base and trees a good dark brown.


Next hi-light the dirt with a lighter brown. Finally add the flock and build up the grassy areas. 


Get your wife to help if you can...

 
Next is to turn those sticks into trees.  This is simple...glue clump foilage to the sticks and once dry trim to ge the tall skinny tree look.  I used hot glue to stick the big pieces and then foam safe super glue for smaller pieces.

Add a few bushes inbetween the trees for flavor.


The last step is to seal the clump foilage with Matte medium...or a cheaper alternative of watered down Elmer's Glue (PVA Glue).  I have heard that Elmer's will yellow over time (several years maybe), so keep that in mind.  If you only plan on these lasting a few years, then Elmer's is a cost savings alternative.

The end result  26 feet of treeline!!!!


So what did it cost for 26 feet of Treeline:

Birch board (24"x12"x1/8"):  $7
Basswood (36"x3"x1/8"): $3
Foam Safe Super Glue:  $12
Elmers Glue:  $3
Clump Foilage (5 bags)  $9 ea
Woodland Scenics Ballast Grey Fine:  $13
Hot glue sticks:  $10
Craft Paint:  $6
Q-tips:  $3
Total: $102

If I used Matte Medium the total would be $109

Woodland Scenic Matte Medium 16 oz (Prepared):  $4.98 (would have needed 2-3
bottles)

I didnt use up all the Ballast, Super glue, hot glue sticks, or paint.  Only the ballast would last through 1, maybe 2 more, sets fo 26 feet of treeline.

And it took roughly a 2 weeks to make everything if you include the drying time of teh matte medium/Elmer's glue.  A worthwhile investment for some cool terrain to add to teh table.

Tuesday, January 8, 2013

Building Buildings for 15mm Games on the Cheap


As part of the prep for the Flames of War tournament we are having in Huntsville, Alabama on 16 Feb 13 I we had to either make or buy 6 Italian style buildings and 3 stone bridges.  If we were to buy that for say $25 for 2 buildings and at least $10 per stone bridge we would be talking at least $100 we would have to spend....in addition to the other items on our "Make or Buy" list. 

A buddy of mine who is new to Flames of War just happened to show me some buildings he made for his Napoleonics game using Mat board (the stiff board used in frame that gives you a colored "inner" frame within the frame).  These were pretty slick.  Then it got me thinking...Maybe I could do that for these Italian buildings and bridges.

So what would I need:

- A Plan
- Matboard
- SHARP Hobby Knife
- Hot glue gun and glue sticks
- Waterproof Micron pens
- Paint in various colors
- Superglue (Zap-A-Gap)

I had pretty much all of these supplies on hand except for a a few certain paint colors I was able to make 8 buildings and 4 bridges for under $10 and about 3 weeks of my time (off and on a few hours a day).  If you have to buy a 32"x40" matboard you can find these for under $10....so 8 Buildings, 4 Bridges for 20% of the price!

Plan:

You need to do a little research if you don't want to do a standard square house.

I based my Italian houses of off some JR Miniatures houses and some real life street scenes I found on the Internet.


Then you break the house into floors and each floor into the sides.  In the picture above if you look at the level that is on the upper right corner of the concept picture you will see the sides that come into a point to support the roof.

As you make your plan, make sure you include the dimensions for the figures that will fit inside.  For these, I planned to have 2 medium sized Infantry Bases to fit into each level.


Once you have the base side down, cut out the pieces the you need and do a "semi- dry fit" where you use tape to hold the pieces together.

If all is well, take the pieces apart and use these as templates for the rest of the pieces you will need.

Special note on the roofs...The "Triangle" roof is the simplest.  It is just 2 pieces slightly longer and wider than the floor. I just eyeballed the slope so I didn't have TOO much of the roof overhanging the sides of the building.  When you cut the supports they ....  Glue them into place close to the ends, but not at the edge.  They need to be just inside the wall to help prevent the roof from sliding off side to side.


The "Square" roof is a little trickier. The Square Roofs fit on a flat square section, whereas the Triangle Roofs need the end piece of the floor level to be pointed.  Cut out the sections and when you assemble them start with the trapezoid (long) sections first and then glue the triangle end pieces on.  When you glue the end pieces, line the piece up so the base is level with the edge of the long sections.  You most likely will have "overlap" along the edges to the top point, but don't worry you can just trim that up with your hobby knife. Then glue to supports along the center seam.


The last step is to cut a square a little smaller in width and length than the floor section and glue this in the center of each level, except the ground level.  These help keep the upper levels from sliding foo the lower level.


Bridges are similar.  You have the 2 sides, an upper road section, and 2 ramp sections.  When you construct the bridge start by tacking (using just a little glue) the upper road section on to one of the side sections and then glue the end ramps.  It takes a little fiddling to make sure everything lives up level and straight.  The last step is to glue on the other side section so it is level.  Since you tacked the pieces in place, you can slide them around a little.  Once all is in place, lay a nice solid bead of super glue along the seams to hold it all in place.


The next step is to lay a bead of hot glue along the edges and seams.  On the roofs, this will be the capping level of tiles on the tile roof and for the building levels and bridges it is the decorative brick/stone edging.
 
Next is to paint in whatever you color scheme you have chosen, to include any shading and highlighting. You also paint in all the windows and decorative art (window boxes, flowers, etc...).  And don't forget to paint the inside...floors, windows, doors, etc... This helps make it readily apparent where the openings are just by looking at the inside.
 
A word on openings.  In Flames of War, units can only attack and be attacked through an opening.  Most buildings for sale have openings on all sides.  I built these intentionally to have some levels that did not have openings (windows) on the ends.  This creates a few tactical challenges for the player now...which could be overcome by using the "Loopholes" rule on page 108 in the V3 Rulebook.  This allows a player in the building to to make a Skill Check (just like "Digging In") and allows that team to be able to shoot (and be shot) through all sides it is adjacent to as long as that team is there.  It can not be assaulted through the loophole. Now, just think of the tactical challenges this present to the attacker and defender!
 
The final step is the most time consuming...using the Waterproof Micron pens to make draw in the tiles, bricks, stones, cobblestones.  Waterproof pen is vital.  If you don't use one, a drop of water could cause the ink to run.  I made this mistake and didn't discover it until I was about 25% done.  :-(
 
After the Micron pen work is dos finished you are technically done.  You could add propaganda posters if you wish and if you used Waterproof pens you could matte varnish your work to protect it.


That's all there is to it.  I am going to try and build a larger "L" shaped building and another with an arch next,  Will keep you posted!
Wednesday, November 28, 2012

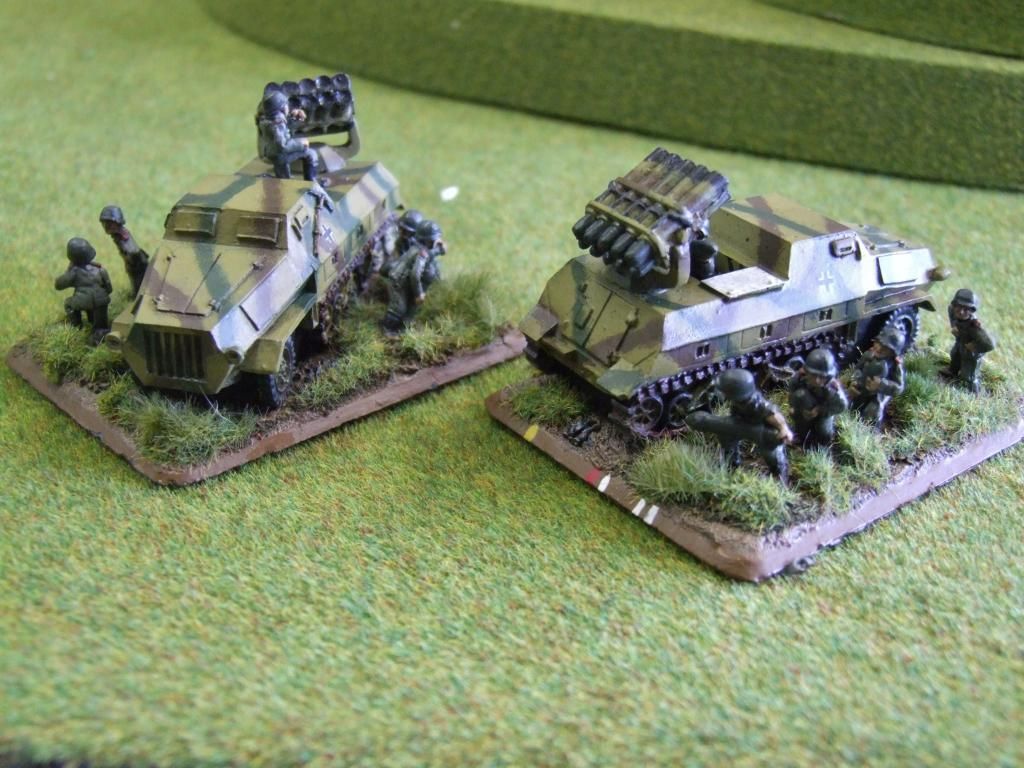
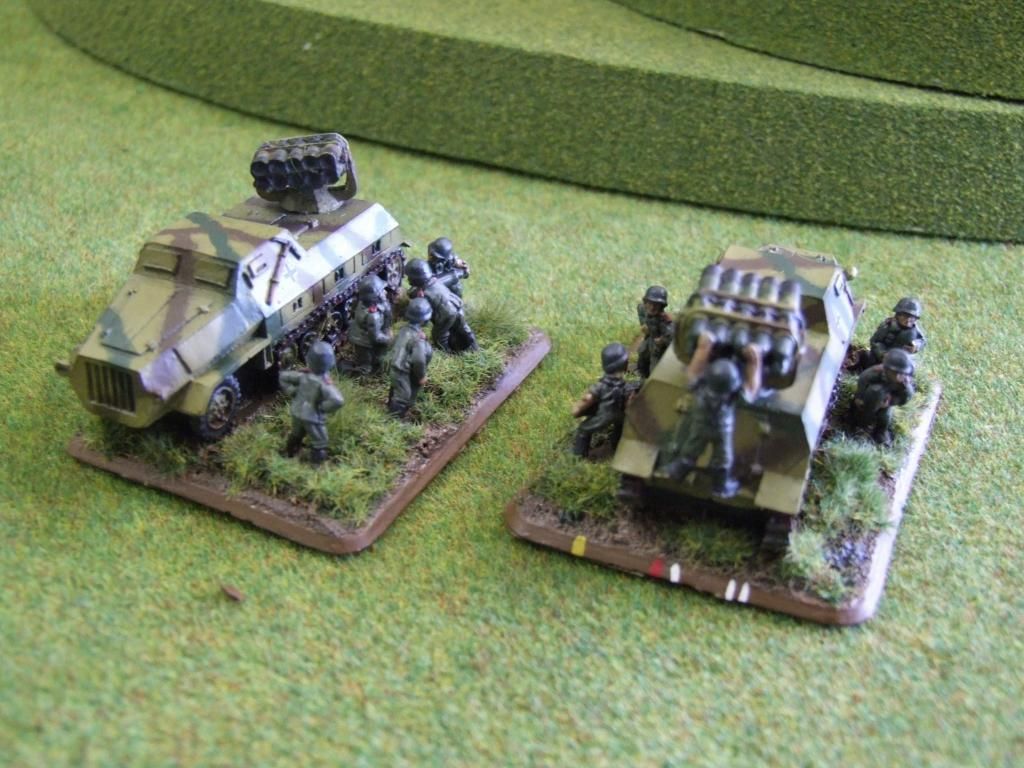
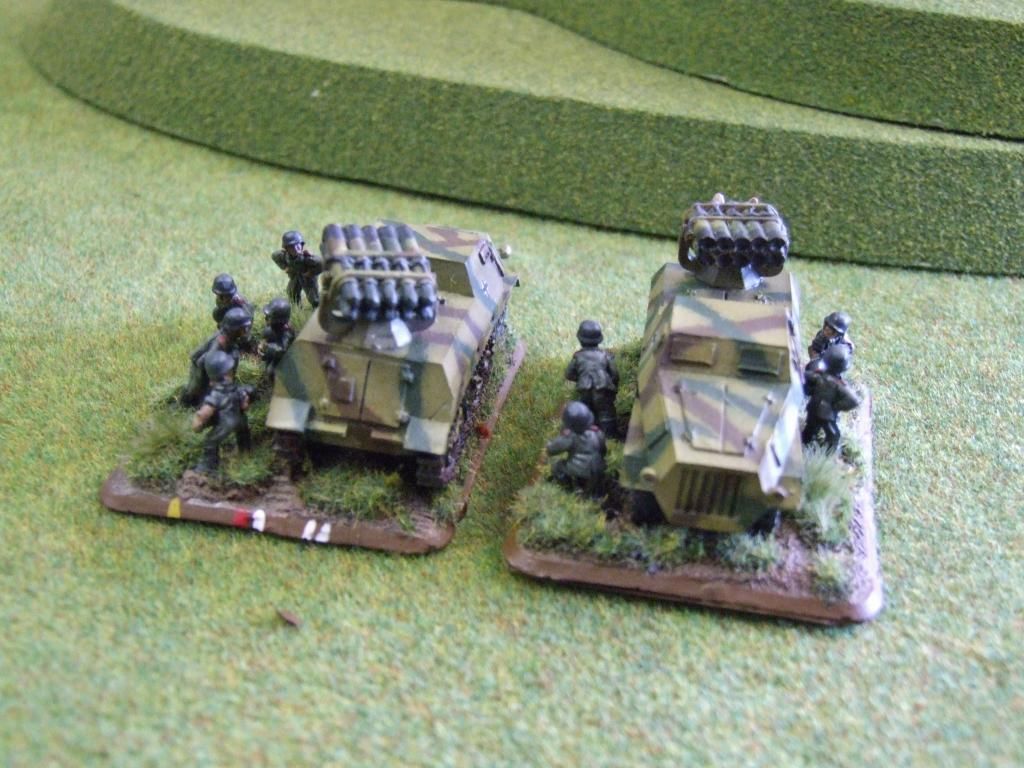
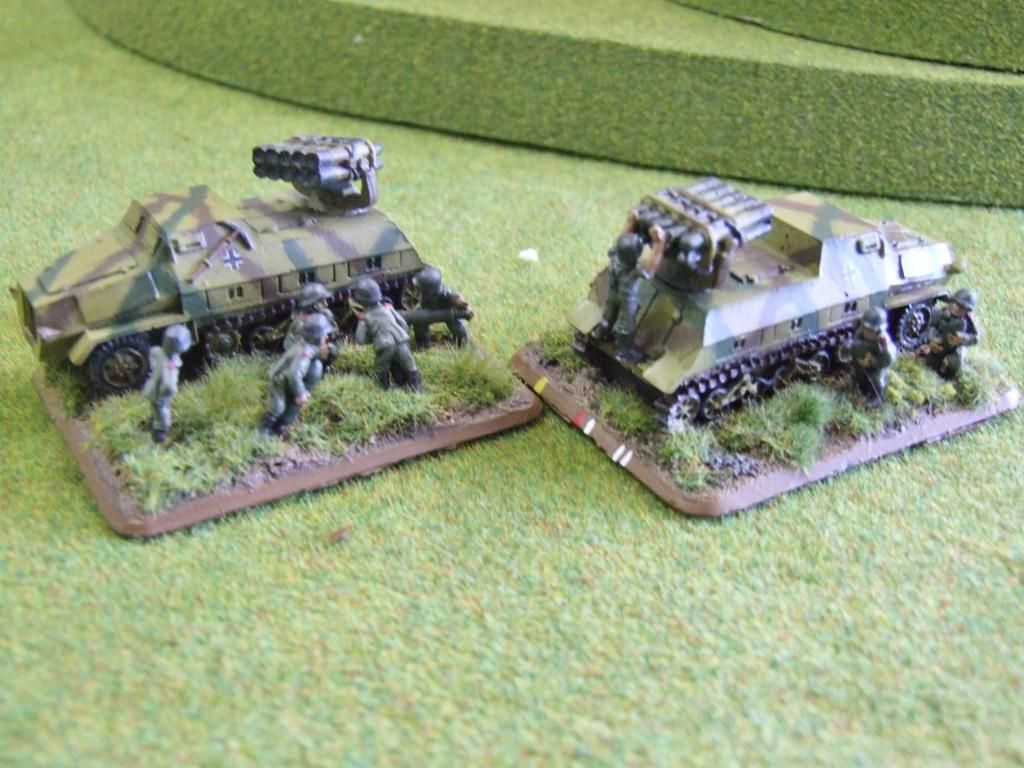
German Panzerwerfer 42 Battery


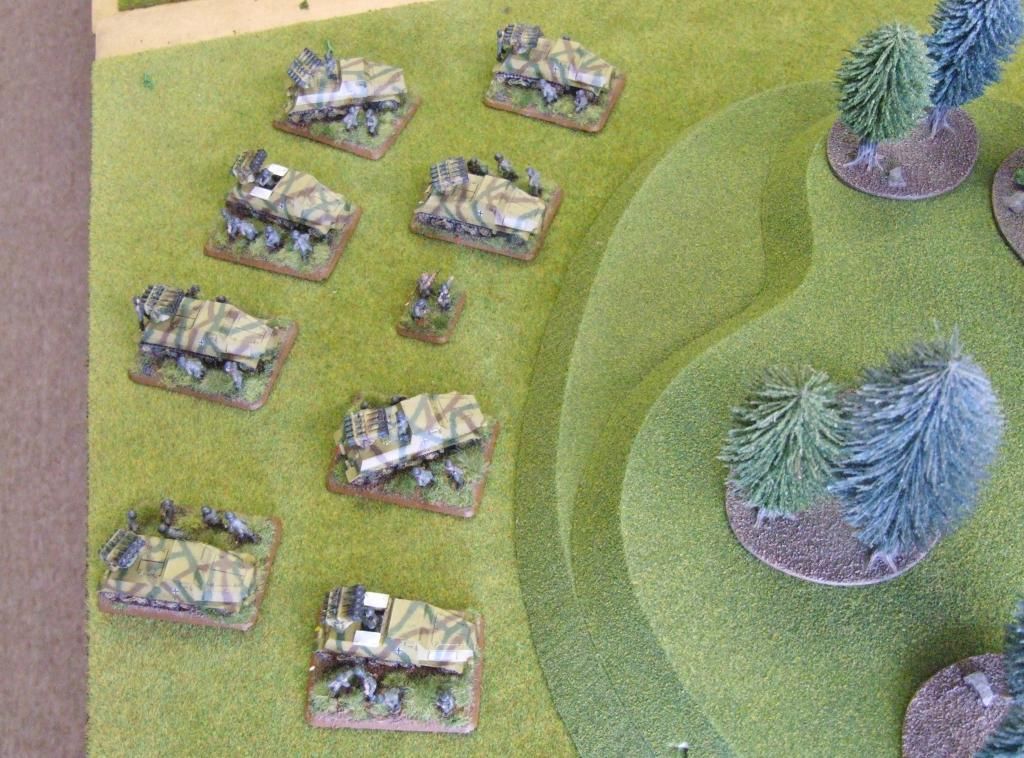
I've had my Panzerwerfer 42 battery for Flames of War in the queue for a while now, but with the recent commission jobs I had these guys had to go on the back burner so to speak.  But then, as so happens in life, several things happened at the same time.  First, I finished the models I had for both commission jobs and had time to paint some of my stuff.  Second, the Devastating Bombardment Template I have had on order for months finally came in.  That gave me the motivation to kick the battery into high gear.

And man, am I glad...this battery is ever so nice.

What am I talking about?  The Panzerwerfer 42 was an armored mobile rocket launcher the Germans used late in World War 2.  For Flames of War, the Panzerwerfer Battery looks like this :


In game terms, it can kick butt With 8 launchers I can use the Devastating Bombardment template which is 4 times the size of the the standard artillery template and make the opponent reroll any saves he makes!

Without further ado...the battery:

Battery Commander:


Forward Observer, 1st Platoon:


Forward Observer, 2nd Platoon:


The launchers are the same in both platoons, so I will so pics  for just 1 Platoon:


Love this box set.  The launchers are great sculps and you have very dynamic poses with the guys on the launchers.  The troops on the ground are the same ones from the Nebelwerfer platoons...its the same rocket after all on the Panzerwerfer.

The models are very quick to paint up.  I used my standard German paint jobs for the crew and airbrushed the vehicles.

I cant wait to get these guys on the table!


Wednesday, November 7, 2012

Making Antennas --- A Relook

I made a video a few months ago on how to make and add antennas to your Flames of War 15mm models. 


This method is great for a sturdy antenna...there is one LITTLE drawback to using wire however.  If you aren't careful, you can injure yourself.  Since you built the model (and probably already stuck yourself once (or twice...OK maybe 4 times), you are careful and avoid sticking yourself again. 

This becomes more of an issue if you let someone else use your models... in lets say a demo or teaching game and they weren't aware of the dangers of the wire....until they stick themselves.

Well...this happened to me recently as I was giving a demo at my FLGS to a friend from work...and he stuck himself on the antenna on one of my PzIVs.  He was a trooper and soldiered on...in fact, he kicked total butt because his blood sacrifice to the Dice Gods must have been accepted as worthy.  I have never seen so many 5's and 6's in  game before.

Anyways, I wanted to prevent this from happening again...to others...and to me  :-)

I started thinking and I saw that some folks used very thin fishing line or even bristles from a hair brush.  Those just didn't fit what I was looking for as they can tend to be too thick.  Then I remembered a technique I learned when doing 1:35 scale models.   You take a spare plastic sprue, melt it in the middle and stretch it to your desired thickness.  Works like a champ.

So I did another quick video showing this technique.

 
One great thing about this technique is that it is cheap.  Almost all the Flames of War models come with plastic parts...and that means sprues you can use for antennas.  So make a batch of antennas from every sprue you have and you will never run out for your needs.
 
Off to swap all my metals antennas with the plastic ones now.
 
Hope this helps....and get out there and paint some models!

Saturday, October 20, 2012

Making a Display Board


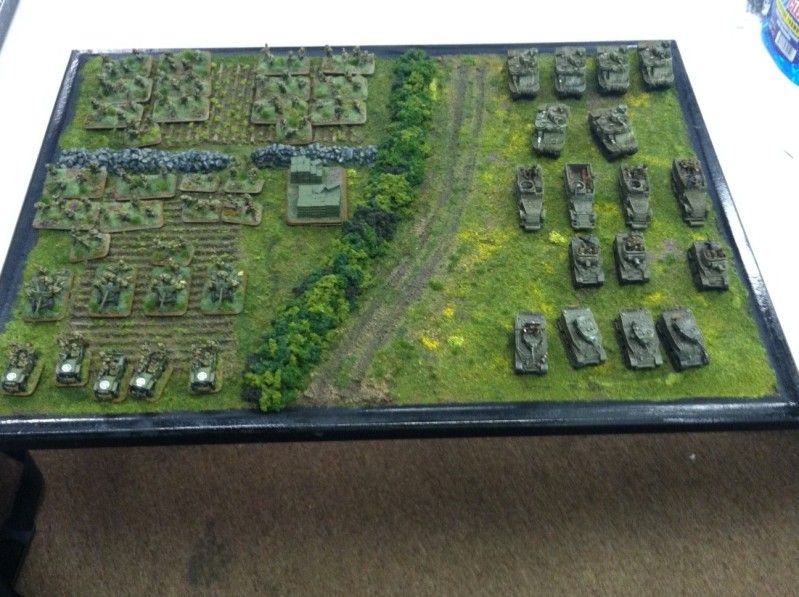
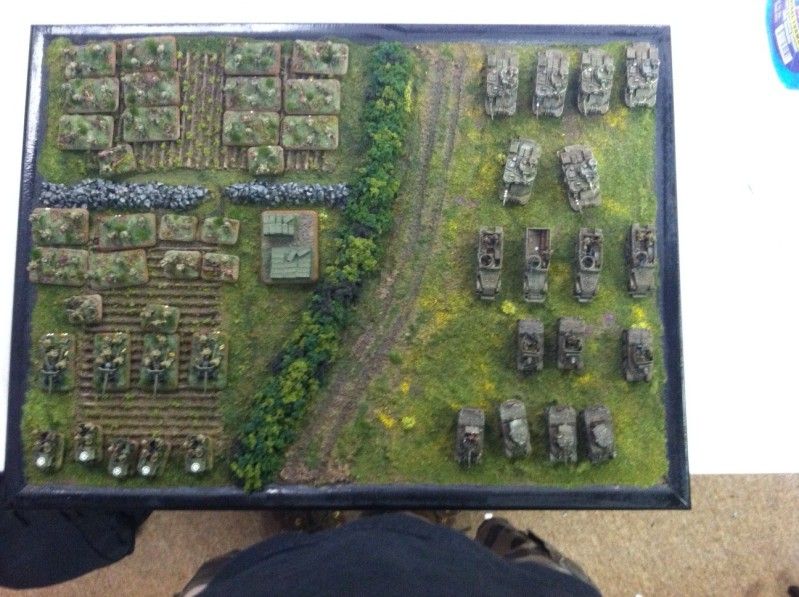
Had a team tourney recently and I need a good carrying board to hold my troops that I was going to use for the tournament....and I needed to make it look good to enhance my troops for the painting competition.

Why did I need the board?  The main reason was to speed up play.  By having the troops I would need for the tourney out...for the entire tournament...I don't have to keep digging into my carrying case, taking out the foam trays to get to all the troops I would need...slowing down each games' setup.  This also saves valuable space in and around the table.

Now, I could have just gone with a simple plastic storage bin lid or something similar...cheap and effective...but not that pretty.  Making the board a display board with terrain really makes the unit POP!

So, how to do this…

Materials:

- 17"x 23" Cork Bulletin Board with wood sides
- Spackle
- Corrugated cardboard pieces
- Vallejo Pumice
- Golden Pumice
- Loose Gravel
- Woodland Scenics Fine Flock (different colors)
- Woodland Scenics Coarse Flock (different colors)
- Woodland Scenics Clump Foliage (different colors)
- Woodland Scenics Ballast (very fine/small rocks)
- Silfor tufts (4mm and 6mm)
- Army Painter Meadow Flowers
- Matte Medium/Flock sealant
- Elmer's Glue
- Hot Glue Gun
- Cheap Acrylic Craft Paints (Americana series)
- Spray Can Gloss Varnish
- Spray Can Black Lacquer
- Sandpaper

Step 1  Have a vision

- To make the board look realistic, you have to have a vision.  Inspiration can come from many sources...look at pictures, really good game tables with lots of terrain, etc... 
- Now, take that overall and pick a section that will fit your board area
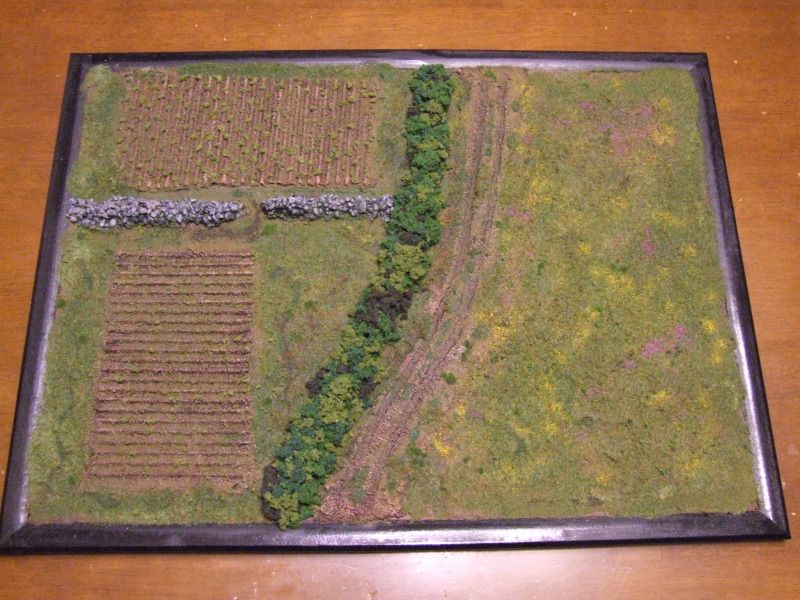
- I wanted to have a road with a hedgerow on the side separating the road from some fields that were separated by a stone wall.  The other side of the road was to be an open field.  This was mainly to allow me to try multiple terrain building techniques I have been waiting to try...Thanks to Sean Morris (The Terrain Guy) for giving me the bug  ;-)

Step 2 Have a plan

- You have to have a plan..otherwise you will waste time repeating things as you have to fix areas messed up by doing a step "out of order."
- My advice...build up and out
    - Build the lower levels first and build upon that foundation
    - Build from the center and then out
- With that vision in mind, break components down into levels and sections to facilitate the "build up and out."
- Write the plan down as a blue print!  If you keep it all in your head you are bound to forget something and miss a step and have to repeat steps to add it back in.
- As you build, use models of the appropriate size to make sure your scale is correct.  Nothing worse than building a board for 15mm and things are sized too big or too small.  That disparity works against you and diminishes the excellence of your paint job you built the board to enhance in the first place.

Step 3  Seal the Board

- I choose a cork board because it was cheap ($5).  You could choose a dry erase board but they are more expensive (at least 2-3 times more).  If you did choose a dry erase board I would "rough up" the surface first with sandpaper and steel wool to help the materials adhere better then follow the rest of the steps for sealing below.
- You will be dealing with a lot of materials that are wet when you apply them.  To make sure the cork and cardboard of the bulletin don't lose their integrity you should protect them from water.  Here is where the gloss varnish and black lacquer comes in handy.
- I didn't think the pale wood color of the bulletin board fit the image I wanted to display for the board so I sprayed the edges a nice black lacquer to give it nice look and to set off the terrain in the middle.
- Next spray the entire board (the edges, the front and the back) with gloss varnish.  This will give a nice surface for the all the terrain to adhere to and protect the cork from moisture during the build process.

Step 4 Let there be... ground!

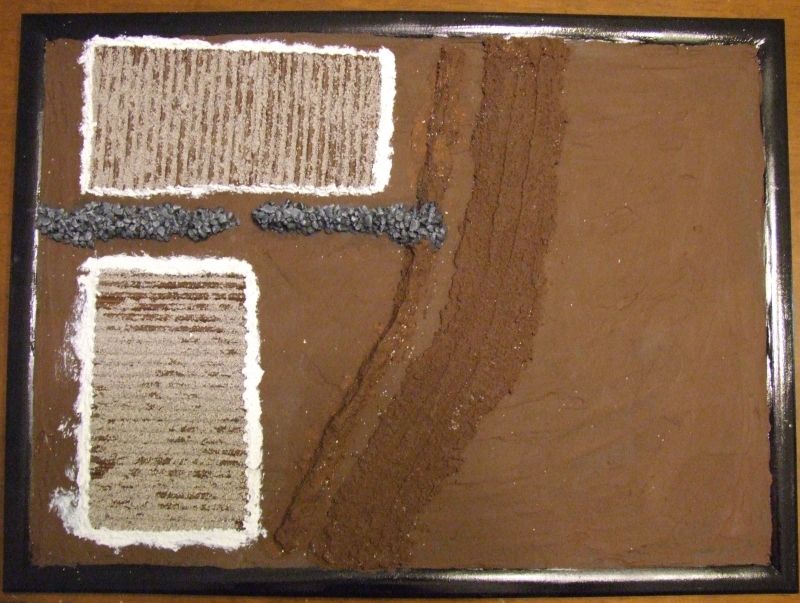
- Take your Spackle and spread it out over the board. This is the base ground level from which everything will be built. You can add textures here and there to give the ground "life" and make it look more realistic...you don't want it totally smooth. 
- Be careful not to get it on your freshly painted black frame.  If you do, simply wipe it away with a damp cloth.  The extra gloss varnish you used on the frame helps protect it from little “accidents” like this.
- Now sand the Spackle down to knock down those nasty ripples or "overhang" spikes that tend to form when you add Spackle to the board.  Again, you don't want to make it perfectly smooth...leave little raises and dips.

Step 5 On the Road again.....Add the road

- The road I wanted bisects the board, so following the "build up and out" we need to start with the road in the center
- Here I used a mix of the Golden Artist Pumice and Vallejo's White Pumice to get a nice gritty rough goo...spread this out in the shape of the road. The bend in the road is to add a little character.
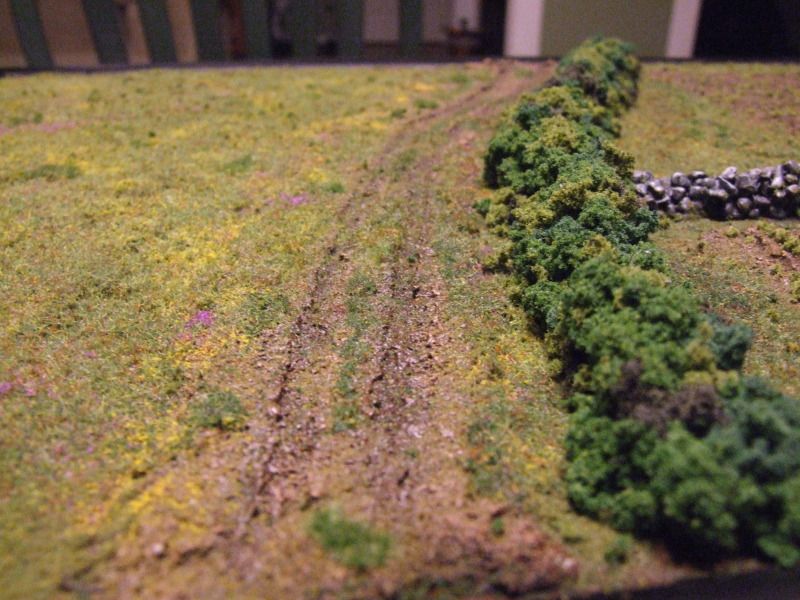
- Next, to make this look like a road you need to add tire tracks.  This road is just a little larger a one lane road and a little smaller than a 2 lane road, so I added 3 paths for the tires (one vehicle gets a little out of the way).  To make these just take the end of a paint brush and drag it along the path where the tires would travel.  Make sure you take the excess off of the paintbrush as it builds up.  Use a model to verify the wide of the tracks.  If you are off....just smooth  the road back out and do it again.

Step 6 Add the Height

- I said that I wanted some hedges and a wall.  To build these and add a little vertical dimension to the board I used Spackle again.
- This time instead of flattening the Spackle out, I left it in a rough mound shape where I wanted the hedge and wall to be placed.  This mound will the base where I will add the clump foliage for the hedge and rocks for the stone wall.

Step 7 Add the fields

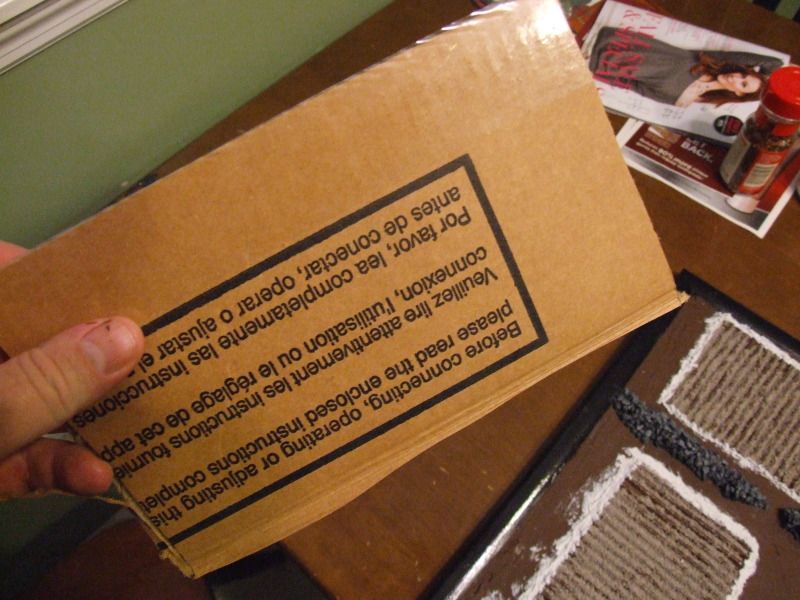
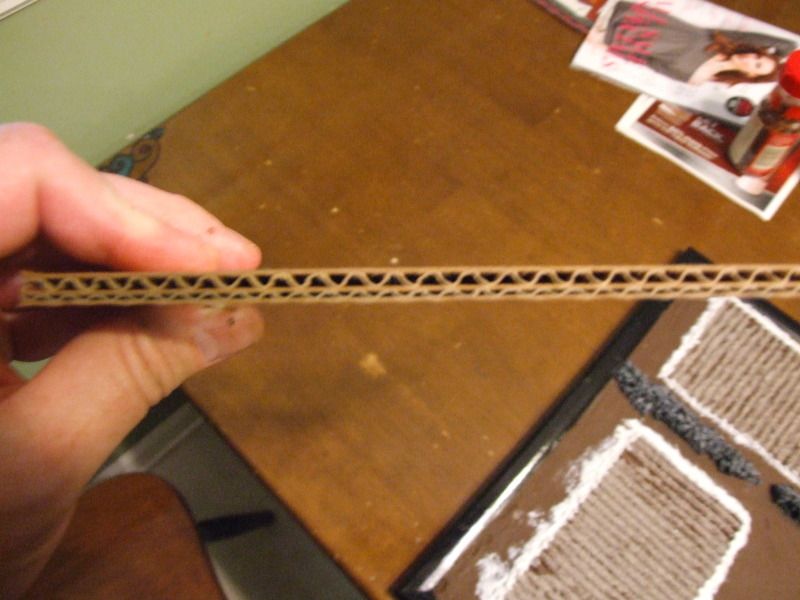
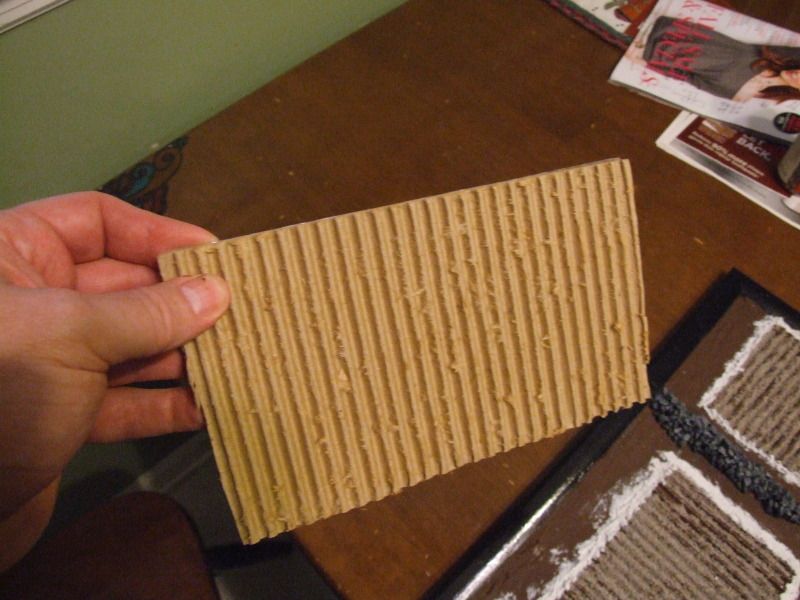
- Plowed fields have nice rows....just like corrugated cardboard.


- Cut the cardboard into the shapes you want
- Take your cardboard and CAREFULLY peel one side of the backing off, leaving the nice bumpy rows.


- Peel off the nasty little pieces of cardboard that like to stay stuck and make it look as clean as possible.
- Paint BOTH sides of the card board with acrylic paint.  It is important to do both sides.  This will minimize any warping the cardboard will do as the paint dries.

Step 8  Plow the fields


- The plain cardboard is a little too smooth and doesn't look like dirt
- Spread a thin coat of PVA glue across the cardboard.
- Sprinkle the Ballast on the fields.  You could use Pumice, but the Ballast is mucgh cheaper.
- Shake off the excess
- Now we have the dirty texture to look like loose earth
- After the glue dries, glue the cardboard pieces into place with Elmer's (PVA) glue.
- Use pumice to blend the cardboard into the rest of the board and go around all the edges taking special care to cover up the "tunnels" where each row opens up.


Step 9  Add Color.


- Use your craft paint and paint the ground, road and fields using whatever color scheme you want
- Start with Americana Dark Chocolate
- Then I used a black wash to add depth
- Finally, I used Americana Sable Brown as a highlight and Vallejo USA Tan Earth as a "Super Highlight."

Step 10  Get the Flock outta here....


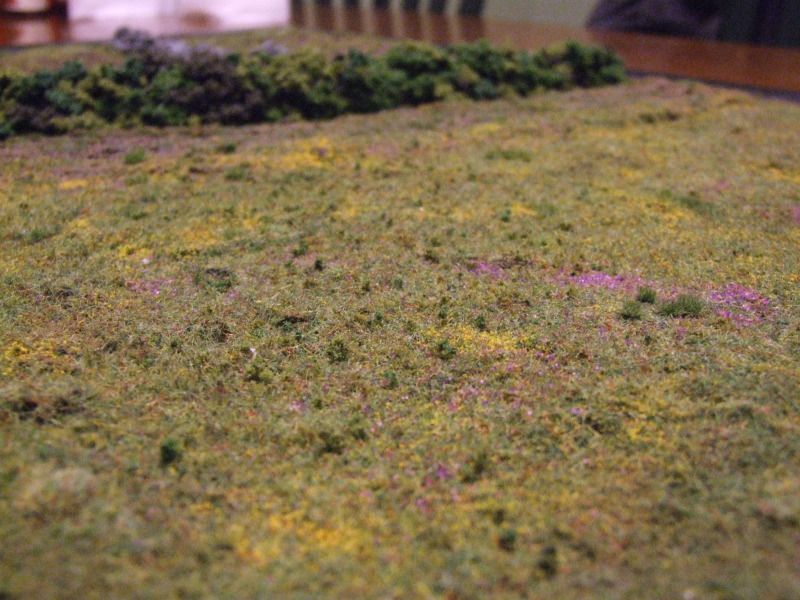
- Add your flock to where ever you want grassy fields.  I used my 3 level flock process (Soil, Turf, Grass).
- Doing this now, allows you shake off excess without getting flock all mixed up on your walls and hedges (I had built my wall prior and had some cleanup to do taking flock off of the rocks)
- Seal each layer with matte medium
- I also wanted to try out some flowers in the open field and used the Woodland Scenics Flowers.  This looks like Steel Wool with colored specks on it.  You are supposed to pull it and spread it out on the board.  It just didn't look right doing it that way.  The "specks" flake off very easy in the bag the flowers come in.  I ended up collecting as much of the specks as I could (helping the process where I could by knocking off as much as possible) and then just sprinkled the flowers where I thought they would be....along the hedges and road and in patches in the meadow.

Step 11  I wanna rock!!!!


- Add PVA glue over the Spackle mound base where the wall is.  Put it on rather heavy, but not to the point where it is running over the surrounding area.
- Build the wall by add the rocks over the glue.
- When the glue has dry add more Matte medium to seal the in place.
- When the Matte medium is dry, paint them.  I used American Lamp Black (Ebony) as a base, then American Neutral Gray, a heavy black wash, followed by a mix of the American Neutral Grey and Vallejo 989 Sky Grey and finally the 989 Sky Grey by itself.
- Apply varnish (Gloss and then matte) with a brush; being careful not to drip on the flocked surface.

Step 12 Bring us…a Shrubbery!


- Ni...Ni...NiNi Ni
- Now is the time for the Hot Glue Gun. Get a little bowl or dish and pour out a mix of the 3 clump foliage colors (Light/Medium/Dark Green).
- Break the clumps down into pieces no bigger than you thumbnail.
- Apply a bead of hot glue about 2-3" long along the outer bottom of the Hedge base
- Pick some clump foliage from your mix at random and apply to the glue. Press the clumps into the glue and hold for a few seconds.  You need to be quick and apply the foliage before the glue dries, and careful enough not to burn yourself.
- Continue with the glue and foliage along on base and when you reach the end repeat the process on the other side of the hedge at the base.
- When both sides have been completed; repeat the process on the top.
- If you have any gaps in coverage...plug them.  If you use the Hot Glue Gun be careful of creating "strings/webs."  I used PVA glue to plug the few holes I had with clump foliage…didn’t want to risk hot glue “strings” getting over the surrounding clumps.
- Once all the glue is dry, SOAK and I mean SOAK all the clump foliage with Matte Medium.  When dry it will protect the foliage from flaking off.

Step 13 Plant Your Field


- 2 ways to plant your crops.
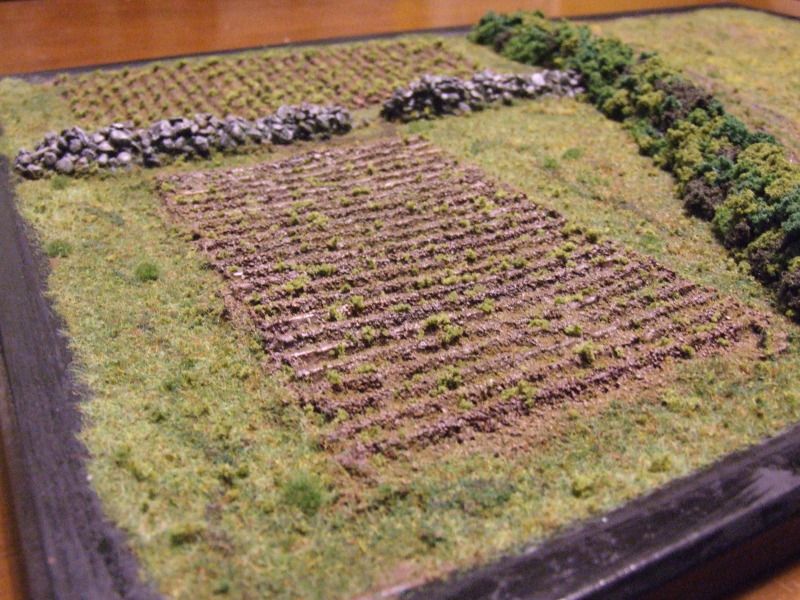
- Fuller mature veggies (like in the picture above)
    - Take scrap pieces of your clump foliage or coarse flock and glue to the top of each row in a  checkerboard fashion
    - Very time consuming but gives a nice look of a lettuce or broccoli patch


- For crops just coming out of the ground (above)
    - Glue random dots of PVA glue on the tops of the rows
    - Sprinkle scraps of clump foliage or coarse flock over the piece
    - Press everything down.  You can use your hand or a scrap piece of cardboard to assist
    - When dry, shake of excess, clean out the valleys of any flock and trim any excess off with scissors
    - This is a little quicker, but gives a very haphazard look.
- Apply a coat of Matte MEdium making sure the veggies get good and wet.

There you go. 


The board looked great...did great at the tournament and helped me and my partner get the highest Best Painted Army scores.  In total, it took about a week...working on it off and on for about 30-60 minutes a shot each day.  Honest Luke and Steve…it was only during times something was drying on the commission jobs I am doing for you :-).  The best part is that out of pocket costs were roughly $25  I used a lot of items I had laying around for the basing of my miniatures anyways (flock, foliage, Pumice, paint, etc...).  The biggest cost items where the bulletin board itself, the Matte Medium, and the Spackle.

I am trying to fiddle with the board and figure how I can best add some storage underneath.  This way I can have my rulebook and Army list and templates all right at hand and don’t have to have them scattered around (or heaven forbid on the actual game table!).  I have a few ideas…just have to play with how to strengthen the board in the middle. 

More to follow as it develops!

Have you made a display board...do you use them?  As Ferris Bueller said "It is so choice. If you have the means, I highly recommend picking one up."