I was a little slow in posting this week, but I had a some news to share that had to wait until today for me to post.
First, is that the gang over at WWPD have asked me ...little old me (old is right, but is 6'4" 260 lbs REALLY little?)...to write reviews for them. After the humbling shock wore off, I said "Of course!"
...and my first article is up on the WWPD site today! It is a review of the Autosahariana boxed set and their use in a Raiding Aces campaign. It looks like the next WWPD campaign will be in North Africa and include regular battles as well as Raids, so this article is the first in a series of the raiding forces that were used in the Raiding Aces campaign we ran at my FLGS...The Foundry in Huntsville Alabama.
Check out the article at WWPD.
Second is that I have joined the WWPD network. You can get to their goodness which includes the WWPD and Saga sites, forums as well as BUNCH of other great blogs that support the hobby we love so much. You can get to them from this symbol:
This is also proudly displayed in the upper right of the blog.
All of this SHOULDN'T keep me from doing what I have been doing on the blog...actually will add to it as I will have access to products to review that I normally wouldn't purchase for myself. I really look forward to sharing those insights with everyone.
Oh well...and we now return you to your scheduled programming
Join the journey of a longtime gamer who has put the hobby on hold for over 20 years as he moves from the pure modelling aspect of the game to the actual purpose of playing the game. Content will focus on, but is not limited to, Battlefront's "Flames of War," and whatever else might spark my interest.
Friday, July 20, 2012
Tuesday, July 10, 2012
Painting Miniatures Declassified --- Model Selection
Just wanted to put together a quick note on figure
selection. Do you have to have the exact representation of a certain figure to
portray a specific unit?
The German Nebelwerfer crew that comes with the set from Battlefront is basically a early/mid war uniform with the knee high boots. For my Late War 5th SS Panzer I had to do a little disguising. The biggest thing was the boots. I took the easy road here and painted the pants a little longer, painted anklets and then the boot...on a few others I left the figure in the longer boots. I read somewhere that some Germans that had been in a while cherished their older boots....these guys are the veterans of the early campaigns ;-)
Short answer is...it's up to you. Remember the post on
"Expectations?" The key here is what "distance Army" are you trying to build
and how best can you "disguise" that "off" figure. If you
are building a 6 inch or less Army you will have to do more disguising than if you are shooting
for a 2-3 foot Army.
Let's say I am build an SS Panzer Grenadier platoon. What
makes an SS Panzer Grenadier different from a Heer Panzer Grenadier? The
biggest visual difference is the black left arm cuff with white writing,
the right collar tag with SS runes and lots of camo uniforms. There are
more subtle uniform
differences... epaulets and camouflaged helmet cover
design...and some I am most likely not aware.
If I use Battlefront's GBX09 Panzer Grenadier Platoon
with Halftrack can I use them to represent an SS Platoon? Well...look for
yourself. The SS Panzer Grenadiers I painted earlier are from this very boxed
set.
These figures can double for SS in a pinch for a 2-3 foot Army with no mods and with a little disguising pass for SS in a closer distance Army. Add an SS arm cuff here and there...paint the SS runes on the collars and paint some camo... the vast majority of people will never know. There will ALWAYS be "that guy" who will point out that the SS "ACTUALLY" had......
Now...how do you disguise a unit to make them fit in?
The first thing you have to do is identify what makes the
unit you are trying to portray unique. Polish dismounted Kawalerii
for instance....the uniforms are most visibly characterized by the Adrian French helmet,
baggy pants and knee high boots.
| Dismounted Polish Kawalerii |
So step two is figure how to make that disguise and make
it believable. Hmmmm... what to do for a unit like the Polish Horse Artillery
where Battlefront does not have a unique Polish gun for this unit. If you stay with Battlefront figs, you have to buy a Finnish 75mm gun and for the gun crews use either the Finnish with German Helmets or regular Polish Gun
crew with backpacks and the "Normal" Polish helmet. In this case, I
am doing some head swaps with some extra Dismounted Kawalerii troops and stole their
heads with Adrian Helmets and a couple extra Heads with Soft caps (Czapska)
from the mounted troops then put those on the Finnish gun crew and at first glance no
one bats an eye...they look the part. A future post will talk more on headswaps. The other option is to see if there is another manufacturer that makes the unit ...but then you have to pay attention to sizing issues between manufacturers.
If you file down the legs a little and make the boot look like it goes up higher or even just paint the boot so it goes higher it completes the illusion. Another option is to use Greenstuff and get your sculpting big boy pants on. Sculpting is another topic all together and one that I am pretty weak at (but always looking to improve).
Step three is to work the disguise throughout the stand
and then throughout the unit. Here is where a theme for the Army comes into
play. If I have other figures that are the "correct" type and my
"off" figure blends in with them, chances are he will go unnoticed...especially if he
is not a central figure on the stand. Or...if all the figures are
"off" figures, but have disguises that match and tell the story that works too.
You can also add a few "thematic" items to the base...like for my
Polish Horse Artillery Battery if I add a horse on a base that really helps sell
the unit. If you have multiple stands like that in the unit it helps
cement the illusion for the overall unit. Decals and unit markings play a similar
role for vehicles.
The German Nebelwerfer crew that comes with the set from Battlefront is basically a early/mid war uniform with the knee high boots. For my Late War 5th SS Panzer I had to do a little disguising. The biggest thing was the boots. I took the easy road here and painted the pants a little longer, painted anklets and then the boot...on a few others I left the figure in the longer boots. I read somewhere that some Germans that had been in a while cherished their older boots....these guys are the veterans of the early campaigns ;-)
| Longer Pants with Anklet and short boot |
| Mix of figs to complete the illusion (lower right has old style boots) |
I hope that this helps you out....and modding units to
fit into other units helps make your force unique and stand out from
other Armies.
Have fun!
Sunday, July 1, 2012
Painting Miniatures Declassified - Decals
Welcome back! This installment is all about applying decals to your
models. This installment also has a video you can here ==> (DECALS VIDEO).
Once the decal is worked into place and dry (allow a few hours at least). It is time to seal it with gloss varnish. Put a coat of gloss varnish over the top of the decal and over the edges. This SHOULD prevent any air getting under the edge and cause the decal to lift off the model and cauese it to have a silver background. All the steps we took to this point are our best attempts to minimize this silvering.
The decals should be firmly set and worked into any detail at this point..."but SonBae they're glossy!" No worries. Just hit them one time with some Flat Matte and you are good to go...the shine will be gone. And if you hit them with a Flat Matte finish now, you are in a perfect position to have you first requirement to apply pigments!
That's all there is to it. Hope this helps and as allways, let me know if you do something a little different...I am always looking to expand my skill set.
Happy Painting!....or should I say Happy Decaling!
But let me get into a little more detail on the process
in this post. The first you need several items to do this.
- A set of Decals
- A gloss varnished model
- A dish of water
- Fine cut scissors/sharp hobby knife
- Detail Paint brush (maybe 2)
- Gloss varnish
- Decal Set Solution
- Patience (lots of patience)
You can get a set of decals in several ways. First is you can use the ones that come with the model kit.
Battlefront's decals are very nice and seperate cleanly.
Secondly, you could buy a set of decals from a third party (Dom's Decals, Plastic Soldier Company, Model
Dads, I94) are all great and offer some great variants that can make your model stand out. If you want
to REALLY make your model unique, you could make your own decals.
This third option is a little more complicated than the "normal" decals, but you can make the decals exactly how you want and not be
limited to the "standard" sets.
To make your own decals you need 3 things. First you need an idea of what you want to print ;-)... Ok, ok, ok...You need a Printer, decal paper that you printer
supports and finally Decal Bonder.
I have an inkjet printer and use Testors Inkjet Printer Compatible
Decal Paper. Most home computers and printers do not print in white, so decal paper comes in 2 types
for us common folk...either clear or white.
This is very important and your first decision is made
here. If you dont need any white in your decal use the clear paper.
The clear allows you to have a little clear"edge" around your design like a
storebought decal and are much easier to cutout as a result. If you need to have white in your decal thing gets a little more complicated. You could use clear paper, but you need to make sure your design is set to print as "clear" and you paint a white
patch on the model where you will apply the decal.
This can be complicated as you have to make sure the white
paint is covered by the colored portions of the decals. This area
needs to gloss varnished as well before you apply the decal (more on that in a bit). A lot of the decals you will make will
need to use white though and here you need to use the white decal paper.
This gives you another decision you need to make as you design
your decal. Do you want to leave a little color border around the white or do you want to outline
the white in black and cut the decal right to the white edge.
Both have their
own issues... cutting close to the white is easy on simple designs (i.e. German Balken Kreuezs) but is nigh
impossible (or time efficient) on complex designs like lettering (vehicle names or registration
numbers) or US Stars in a circle. The trick
here is making sure the background/edge color around the white in
your design matches the color where it will be placed on the model.
Trial and error here and best to use normal paper until you get that color match. You need to
get as close as possible to the shade, but you can touch up paint around it to better blend it in. Also, when you print, use the highest qaulity print setting on your printer and the software you are using. Otherwise you will get the "jaggies" where the edges aren't smooth around the lettering or borders.
So...your design is made and all your colors match. Now you just print your design on the paper... ensuring you print on the correct side of the
decal paper (follow printer and paper guidelines). Next
step is to let the decal dry COMPLETELY.
The paper is a little shiny and, especially on an inkjet printer, the ink will smear if
not allowed to dry completely. I try
to let them dry over night before I go to the next step, so 5-6
hours at least. Once the printing is dry, you spray on the Decal Bonder over the printed sheet. This provides the clear "plastic" top layer of the decal. The ink we printed earlier binds to this layer and
stays with it when it seperates from the paper backing. The
trick here is to spray "JUST enough" and not "TOO much". If you dont spray enough, the ink could run or the decal could tear easier. If you spray too much, the decal is thicker and wont fit into detailed areas very easily. Now, let the sprayed decal sheet dry thoroughly. I
usually let it sit over night (say 5-6 hours). One trick I do when I make my decals is to print in the morning; let it dry; spray it with the sealent after dinner; let
it dry overnight; and then apply the decals the next morning. You
can also make them in advance. The key
here is to not let the printed sit around too long with sealent being applied. Until the sealent is applied, the decal could be smeared.
Once the sealent is applied and dried, you now have several
months you can store the decal before use.
I haven,t gone beyond 6 months with a homemade decal being
stored at room temperature after being sprayed with sealent so the ultimate length of time is
unknown. I have been able to use Battlefront Decals that were sitting at room temperature/humidity for almost
2 years with no ill effects. I
just had to soak them a little longer in water for the paper to seperate.
So, now you have your decal sheet in hand. The process from here on out is the same whether the decal is from Battlefront, 3rd party or homemade (although
homemade does have one extra step). Now you want to make sure the model is gloss
varnished...at a minimum the area where the decal will go should be gloss varnished. Decals adhere best to a smooth surface and
gloss varnish provides a very smooth surface for which the decal can adhere. Let the gloss
varnish dry completely before applying any decals!
Now you get to apply skills you learned in Kindergarten or Pre-school. You get to use scissors (No running now!)! I recommend some really sharp scissors that can be manuvered easily. Scrapbooking scissors work like a charm here. Hobby Knifes/Exacto Knifes can be used too, but you can leave "pressure" marks on the decal where you place the knife down to start a cut. When you cut the decal out you want to leave an "edge" around the decal. On "Professional" decals, you can see the actual edge of the decal. For these your want to leave a paper edge around the actual decal. For homemade decals on clear paper, your edge is a little sliver of "clear" around the actual design. For homemade decals on white paper, your edge is typically the color background you used that matches the color of the model. If you used a black outline as an edge and dont want the black to show, you need to cut carefully to the inside edge ofthe black...which can be VERY tricky. I tend to only cut the decals I need for a specific model at one time and once those decals are applied I move to cutting out/applying decals to the next model. It is easier to organize the decals while they are on the sheet as opposed to wrangling down a bunch of loose decals....some of which can be small. Nothing worse than cutting everything out and have to stop mid-process and run the risk of those decals getting blown/moved around and all jumbled up....or even lost! If they stay on the sheet till you need them this doesn't happen.
Next...get you a little dish and put some water
inside. I find a saucer works very well.
The sides angle to the top and this helps me move the decal around
easier. The water used is nothing fancy. I use filtered tap water...some will recommend distilled
water. All depends on where you live as to what you can get away with...the fewer impurities in the water
the better. Place the decals you cut out into the water. I
like to place them face up...helps me see the next step better. You leave
the decal in the water until it slides off the paper backing
EASILY. If you rush the process you could tear the decal. Some decals
need longer in the water than others. I
find it best to use a size "0" paintbrush with 1/2 inch long bristles. This allows you to under big decals and keep them from curling as well as lifting up the little decals. For very small decal decals a smaller detail brush is better.
The key is to have the entire width of the decal fit on the brush...not just a corner. Use the bristles to slide the decal off the paper. The
bristle are soft enough so cant apply too much pressure and tear the decal. Just don't press so hard where the ferrel (the metal part on the brush holding the bristles) hits the decal...you will tear the
decal this way.
While the decal soaks, you have a couple of minutes to
prep the surface. Remember...we shouldn't even be at this step if the surface doesn't have a gloss surface. To prepare the surface for the decal, take a little of the Decal Set Solution and apply a light coat
where the decal will go. This gives you
a liquid base to place the decal and will allow it to slide
around into place. Nothing worse than putting the decal down and you can't slide it into place. If thi does happen though, apply a little more Decal Set,especially around the edges of the decal...this should be enough to get it floating. Sometimes water is enough to do this as well. The setting solution also helps the decal "melt" into any detail on the model.
Again, practice makes perfect in knowing when you have enough decal set down as a base.
Once you have the decal set down, it is time to get the
decal and place it into place on the model.
A great tool for this is the trusty "10/0" or GW "Detail" paintbrush. Give the brush a good point and start to slide the decal from its paper backing.
If it slides onto the bottom of the dish just try to lift a corner and get it to float. Now, it
is just a matter of lifting the decal from the water and placing it on the model.
You want it to be a little wet still, but again...not TOO
wet. Dab any excess water off with a paper towel. If it rolls or curls or gets out of shape, just place it back into the water and gently work
it back into shape. As I said you need patience for this.
Once you get it on your brush, slide the decal into position on the model. As you
position it, make sure you get rid of any airbubbles. Once it is in place, you can GENTLY dab any excess water away with another brush, paper towel, cotton cloth,
etc... Once that decal is in place, repeat the process with the next decal.
Once you have the decals in place you are ready to
"work" the decal into the detail of the model. German tanks with Zimmerit are the worst case, but you
can still apply decals there. Take
some more decal set and apply it to the top of the decal. GENTLY use the tip of a soft paintbrush and dab the decal into the detail.
How thick the decal is determines how long it will take to work the decal into the detail....also how much decal set you will need. Somethimes you might need a second coat of Decal Set (or third) Here is where not putting TOO much Decal Bonder on your homemade decals is important.
Care really needs to be taken here as if there is any point
where you will rip a decal...this is it.
Between the decal set softening the decal to the
paintbrush dab (stabbing) the decal...the rip-o-meter has moved into the red zone for sure. Sometimes, I will put a drop of decal set on top of the decal and let it sit for a few seconds then work it in. This is one of those techniques that require a lot of practice to master.
Once the decal is worked into place and dry (allow a few hours at least). It is time to seal it with gloss varnish. Put a coat of gloss varnish over the top of the decal and over the edges. This SHOULD prevent any air getting under the edge and cause the decal to lift off the model and cauese it to have a silver background. All the steps we took to this point are our best attempts to minimize this silvering.
The decals should be firmly set and worked into any detail at this point..."but SonBae they're glossy!" No worries. Just hit them one time with some Flat Matte and you are good to go...the shine will be gone. And if you hit them with a Flat Matte finish now, you are in a perfect position to have you first requirement to apply pigments!
That's all there is to it. Hope this helps and as allways, let me know if you do something a little different...I am always looking to expand my skill set.
Happy Painting!....or should I say Happy Decaling!
Friday, June 22, 2012
Battlefoam Custom Tray Review
I just received my custom Battlefoam order and I am blown away. Simply stunned at how easy the process is, the price, the great customer service and the quality of the trays. Bottomline up front: 18 out of 16 fully protected painted miniatures. They get 2 bonus points on top of the 16/16 for customer service ;-)
Ok…what is Battlefoam you ask? It is God’s divine gift to miniature players to protect your figures as you carry them to and fro and hither and yon. I am specifically going to talk about the Flames of War bag and custom foam for that bag; but, the basics of the custom foam are the same for the other products they make.
First you go to Battlefoam’s website (website). They have custom trays for just about every game system out there and as well generic bags that cover everything else. Each system has different length/width/heights so you need to know what these are when you make you order. Most of the systems already have pre-designed trays and in the Flames of War section they have trays for specific units. Check here first to see if there is a ready-made tray that fits your needs. Ready-made FoW trays are $12.99 each and Custom trays are $18.99 each…so if you find a ready-made tray that works you can save some cash. I wanted something a little different and wanted to make trays for each platoon/group of platoons so I had to make custom trays.
Before we talk how to make the custom trays, we need to have a plan. How do you want to organize each tray? You don’t need specifics at this point…just general groupings. For instance, I wanted trays for:
| All 3 of my Para Infantry Plts, their Platoon Leaders/PIATs/Light Mortars, and the Company Command Section with all the PIATs and snipers |
| 8 gun Artillery battery (and all their vehicles) and a Typhoon |
| Engineers and 2 Para Infantry platoons that will be based on Urban stands |
If you don’t have a rough plan you will be spinning your wheels and possible leave a unit out.
So how do you make custom trays? The first thing is to watch the video with Romeo (Battlefoam’s Cool Dude In Charge) explaining the process. In summary, there are 2 ways to do this. The first is to use the Custom Tray Design Tool Battlefoam has on the site…this is a slick app that you can use where you can play around with the specific size and shape for each hole in the tray…more on this in a bit. You can also just trace the model on size specific paper and send that in. The tracing is good for “odd” sized or custom figures from Warmachine, Warhammer and 40k. The tool actually has shapes for pretty much all of the “basic” stands/vehicles/ships for the games in the tool as well as generic shapes of different sizes. The tool is by far the easiest method and gives you positive feedback if you screw something up.
So what is the “tool” of which I speak? You can find it on Battlefoam’s website in the upper right corner. The tool allows you to select a tray size and then gives you options for different shapes to place within that tray. The tool even accounts for “buffer” space between cut-outs and alerts you if you have an overlap (the shape(s) in error turn red).
How do you use the tool? Romeo does a great job on his video and the tool is intuitive, so I will give you helpful hints on using the tool. The first is to have a plan for each tray. Second is to know the tray size and the ultimate “stack” height you will need for your carrier. My Flames of War bag is officially 9 in tall. So the maximum number of trays I can stack cannot exceed that height. When you do your math in adding the tray heights make sure you add an extra 0.25 inch per tray to account for the tray bottom. If you don’t you could your stack not fitting in your bag.
One other thing Battlefoam offers that is real slick are their custom foam toppers. These are 0.25 in thick foam that will go on the top of the foam stack in your box. They offer a plethora (I would say they have a plethora) of toppers with different unit logos cut into the top.
Too cool. Again 18 out of 16 fully protected painted miniatures.
********* Disclaimer: I have received no compensation for this review and the review is based on items purchased**********
Thursday, June 21, 2012
Painting Miniatures Declassified - Pigments
The show room finish on vehicles only lasted while they
were in a paved motor pool. Even then
they get “dusty” just from the environment, whether in an urban or a rural
setting. One way to weather vehicles is
to use pigments. What are pigments? They are colored powders that can be used to
create many different weather effects.
MIG (MIG Website) and Vallejo (Vallejo Website)
both produce pigments that are perfect for what we need to do and both have a
broad range of colors to cover any situation you can think of. I will let you make the decision as to which
is better…I use MIG for work. This is mostly because that is what the hobby
store when I first started experimenting with pigments. I primarily use pigments to create dirt and
mud effects on my vehicles and this is what I will be focusing on in this post.
You can also use pigments to create urban weathering. For instance, brick dust, rubble dust can be
simulated…just use the correct colored pigment.
I will make future posts on other weathering techniques and other uses
of pigments.
So…why should you use pigments? For dirt/dust effects, pigments give a very
realistic look compared to a “mud wash” or textured paint. Think about it. Real life dirty vehicles look dusty and the
dirt has texture to it. Textured paint
(like Games Workshop’s new range of textured paints or mixing a little paint
into pumice or glue with sand in it) can give you the color and texture and
replicate a freshly muddied vehicle, but are lacking when it comes to a dusty
vehicle. Here is where pigments shine in my opinion. Since they are dusty to begin with, they
replicate dusty effects perfectly. And
let’s face it…vehicles are dusty A LOT of the time. But how do you make a dusty vehicle and still
be able to play with it and not rub the dust off?
Ahhhh here begineth the lesson and a video! (Pigment Video)
To get a dusty effect like the PzIVH pictured above I
used the following equipment:
- Flat Matte Finished Model
- MIG Pigment: Europe Dust
- MIG Pigment: Dry Mud
- MIG Pigment Fixer
- Worn out “Thick” Paintbrush to use with pigments
- Medium Paintbrush to use with Fixer
The first step is to determine what you want the dust to
look like. Here your creative storytelling
juices can flow. For my PzIVH, I wanted
to have a group of vehicles that have been moving around the countryside and been in action for awhile. I wanted them to have some built up mud and road dust on them, but not too fresh and had been knocked off a bit from their movement.
So this drove me to use MIG’s Europe Dust and Dry Mud pigments. Fresh mud would be in the tracks and splash
guards and the dried mud/road dust would be higher up on the vehicle. Dried mud/Road dust is lighter in color than
the fresh mud which is deeper and darker. If I wanted fresher mud/dirt I would have used a dark pigment like Track Brown.
So now I have my story and colors selected…what next?
Now the fun begins!
The first step is to make sure your model is sealed with a Flat Matte
finish and that the finish is completely dry.
I am not sure of the exact physics, but a Flat Matte finish helps the
pigments hold to the model much better.
On a gloss finish, the pigments can slide around. This can be used to good effect if you only
want the pigments to rest in the detail.
Here you apply the pigment of choice and, with your finger, rub the
pigment off of the high areas. This can
be used to show where troops have been walking around a dusty area.
Applying the pigments is easy….but can be messy. To help with the mess that you WILL create, hold
the model over a tray to catch any pigment that falls off (you get a 2-fer on
recycling…one for the tray and another for the pigment it catches which you can
reuse). If the model has a Flat Matte
finish, you can apply the pigment directly to model. You can brush it on for a thin even coat or
tap it on for a more uneven look. I do
something a little different for my tracks and vehicle sides. I apply fixer to the area where I will apply
pigment before I apply the actual pigment.
Then I apply the pigment pretty thick and heavy where I want a built up
mud look and a little lighter and “wispy” where I want a dusting. I probably don’t need to add the fixer first
and can still achieve the same look. I did this when I first started using
fixer and liked the look…don’t mess with success, but I am going to test it out
with a pre-coat of fixer when I get a chance and see if there is a
difference. To get multiple dirt/mud effects, I start high
with the lighter colors to show dried mud/dust and then apply the fresher,
wetter, darker colors on top of that and lower. I tap the pigment in spots to get
“bigger” pieces of pigment to fall and replicate clumps of dirt.
Once the
pigments are applied it is time for the magic and to make the pigments
disappear and then reappear. “S-s-s-s-s-say
whut?” Yep. I get my fixer out and a separate brush and
then dab the fixer on top of the pigments….everywhere I applied them. When the fixer hits the pigment, the pigment
WILL disappear. But fear not! As I wave my magic paintbrush/wand…Hocus
Pocus Pigment come into focus…As the fixer dries the pigment will reappear in
all its glory! First time I saw this I
freaked out and applied more pigment and then when everything dried I had TOO
much. So anytime the pigment gets wet,
the color will disappear and reappear when it dries. As you apply the fixer you can create
different effect. If you brush it on,
you can move the pigment you applied around and basically “paint” the effect
on. Be warned though, this can leave
noticeable brush strokes. I like to the
fixer on the brush…pretty heavy…and then gently touch the side of the brush to
the pigmented area and let the fixer flow off the brush naturally then lift the
brush off and repeat. This technique
minimizes movement of the pigment. With
the fixer applied is there anything else we need to do?
Yessirree Bob
there is! The fixer gives a LITTLE protective shell to the pigment
and will keep it safe from mild…very mild…use.
To be able to use the model in a game I recommend giving the model a
Flat Matte coat once the fixer has completely dried. This will lock the pigments into place and
they won’t rub off from use. Using a
fixer first is a must before you apply the Flat Matte finish. If you don’t, especially if you use a brush
on flat matte, the pigments will get all smeared and you will have a “was”
effect and not the dried mud look.
One other
little trick you can do with vehicles is to add carbon buildup around the
muzzle of the vehicles’ main gun. Just
apply some black (MIG Smoke) pigment to the tip and a little down the sides of
the barrel and then add your fixer….BAAAAM!
It looks like the vehicle has been doing a good bit of shooting. This goes a long way in telling your story.
Let me
know what you think…any other ideas/techniques you use
Friday, June 8, 2012
Painting Miniatures Declassified - Priming Part II
The "Declassified" post on Priming your
figures stirred up a lot of conversation about the differences in what I was calling
a TRUE Primer and what could be used as a substitute for a primer.
ancientsociety on the WWPD forums said it best when he described a primer as "True primer is specifically formulated to increase the adhesion of subsequent layers by increasing hygroscopy and porosity. In the case of metals, primer also acts as a barrier against oxidation. Paint and primer are two very different mediums and its important to point this out to beginners." Full Thread Here
- Orange = Acceptable...slightly less than the standard. Appears to be extra build up of primer in deeper recesses. This shows up as whiter areas than the rest of the figure. It might be an optical illusion, but again was only slightly less than the standard.
- Red = Less than standard. As expected, the uncut primer did clog enough detail to be noticeable.
- Blue = Acceptable...in between the Orange and Yellow samples.
- Green = Acceptable...Very minor clogging of detail similar to Orange sample.
- Yellow = Could see bare metal on 4th pass
- Orange = Could see bare metal on 3rd pass
- Red = Primer showed no changed
- Blue = Undercoat showed no change
- Green = Primer/undercoat showed minor wear after 5th pass (Could begin seeing bare metal, but there was still a THIN coat of primer over it)
- Red = No wear after 5th pass
- Blue = No wear after 5th pass
- Green = No wear after 5th pass
From Right to Left Yellow-Orange-Red-Blue-Green
Conclusion: As long as you use a gloss varnish with Matte varnish on top of that, a Black undercoat whether airbrushed or brushed/blown off generates the same "protection" as a Primed model that has been gloss and matte varnished. Add to this detail on 15mm models that is preserved with an undercoat that I am looking for and I have my winner. The one thing that you should not do is thin your primer with water. That was a clear negative no matter how you look at it.
ancientsociety on the WWPD forums said it best when he described a primer as "True primer is specifically formulated to increase the adhesion of subsequent layers by increasing hygroscopy and porosity. In the case of metals, primer also acts as a barrier against oxidation. Paint and primer are two very different mediums and its important to point this out to beginners." Full Thread Here
In the same thread MiniuteaOfWar mentioned that undercoat
and primer are used interchangeable even though they are technically
different, but can be used for similar purposes to varying degrees.
I believe that is exactly what I have done here. I have
interchanged Undercoat with Primer. When I was talking about a TRUE
primer, I was referring to primer as described by ancientsociety and elsewhere in the post I was
really referring to an undercoat. Are they different? Yes in a big way, as
ancientsociety described. If we use my walking on ice analogy from the
first Primer post, the undercoat is like throwing kitty litter on the
ice...it gives enough traction to get from point A to Point B (if you don't
run), in this case to build the paint up and seal it with a varnish which holds
it all in place. Primer is like throwing rock salt on the ice....it etches
the metal like salt etches the ice.
So why use an undercoat instead of a primer? For me it is
about the detail I want to preserve at 15mm.
My experience has been that primer is a little thicker than an undercoat and can clog detail that I want
to preserve in a 15mm figure. This
is important to me because I am putting a gloss varnish and then a flat matte finish on top of the finished paint
job that will further "clog" the detail. So I want to preserve as much as possible to give a realistic look and let the model (and the
sculptor) do some of the work for me. The
more detail that is "clogged" the more I have to work to
make it "pop".
More work equals more time and in the long run takes away from the look I am trying to achieve. At 28mm this isn't an issue for me as the detail is deep enough (usually) and a primer still leaves enough for it to pop. An undercoat, being thinner, doesn't clog the detail in a 15mm figure at
the start and I am able to preserve more of it through the painting and
varnishing process.
So what are the downsides to an undercoat? First and foremost is that until the varnish is applied there is greater risk to the paint
being rubbed off. A primer is also supposed to aid in the prevention of
oxidation on the metal. An
undercoat does not do this. Have I seen
rust develop under painted models that only used an undercoat? Can't say that I have, but it doesn't sound good.
I can picture rust forming under the paint and the paint then flaking off.
I do know that I have some models just under 10 years old where I have used this process and haven't seen
in difference between those and ones that I have just finished. Time will tell perhaps. The key, I think, is that once the varnish is applied it
locks everything in and that plastic shell should help prevent oxidation as well (keeps
air and water out). Maybe? Makes sense logically as water and air are need for oxidation and the varnish keeps those out.
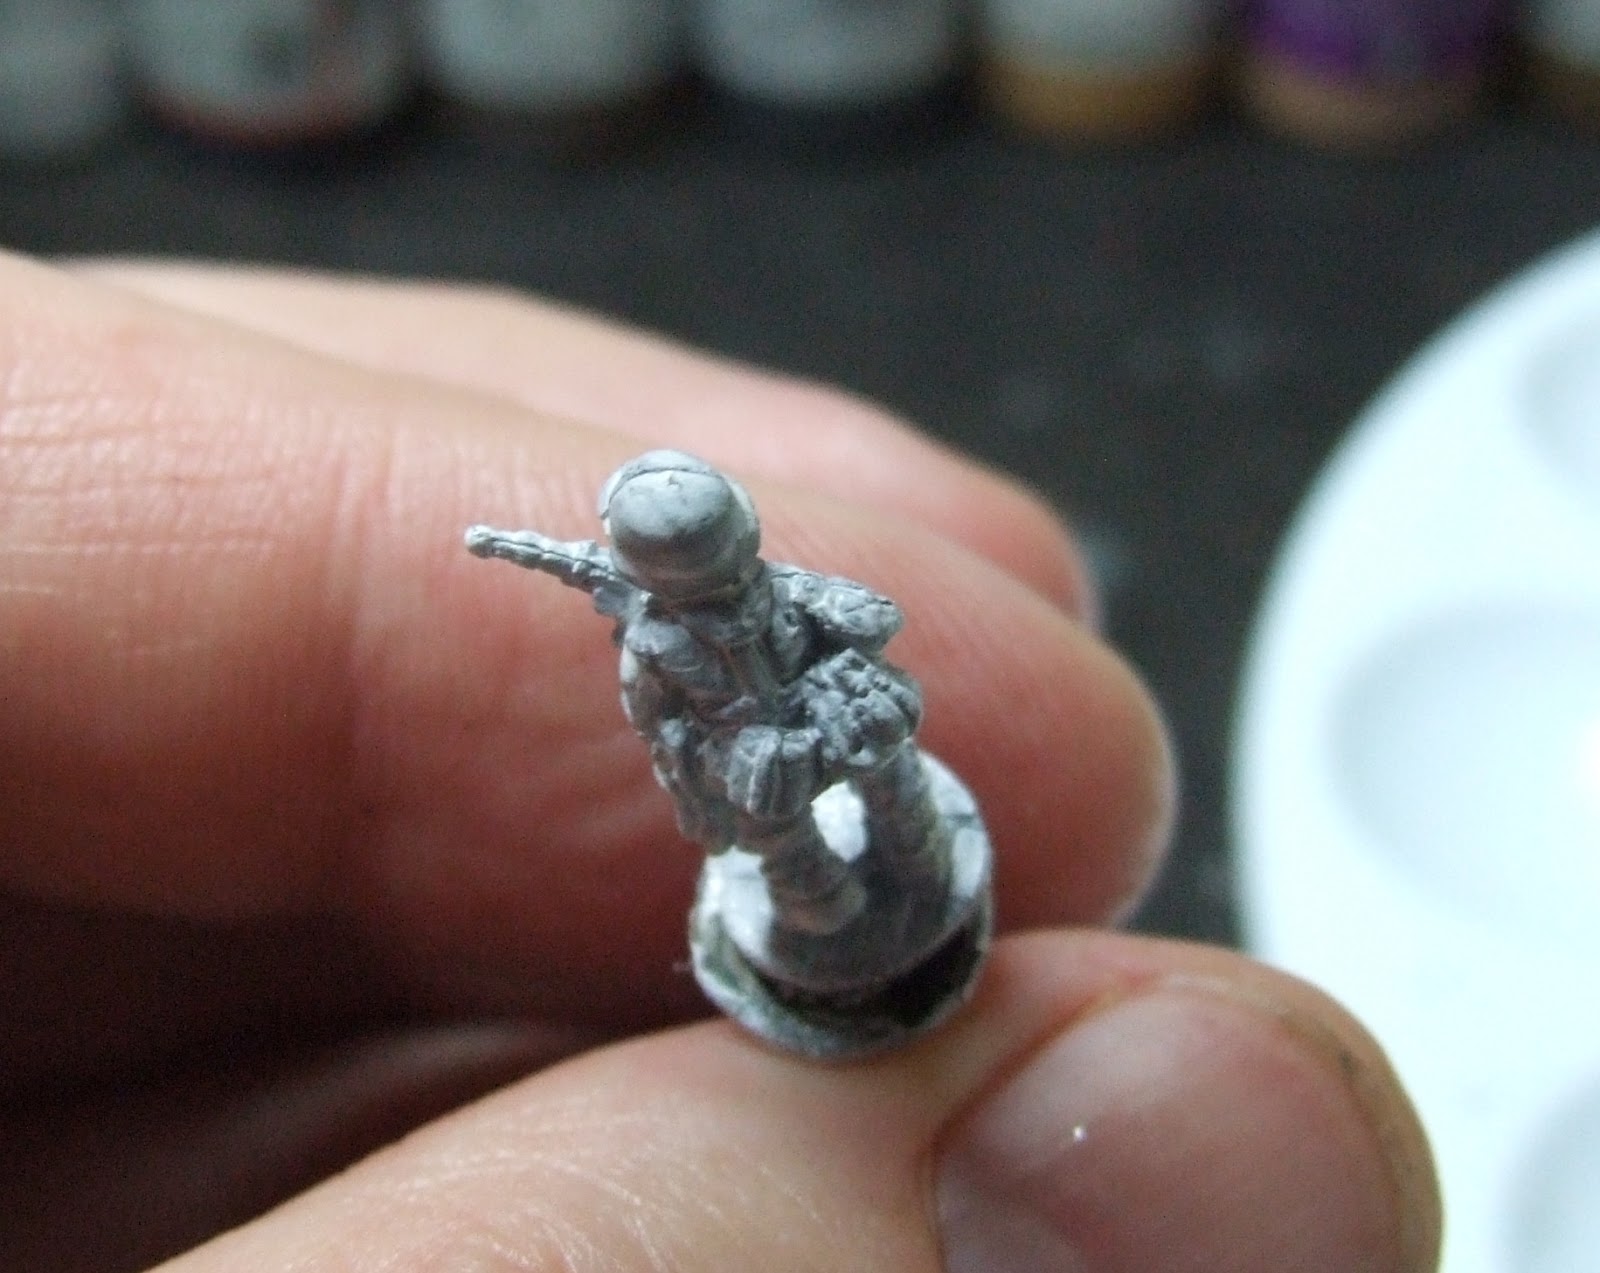
I ran some experiments over the weekend on the difference between a primer and an undercoat and the
results were quite surprising.
I took 5 similar spare figures I had lying around and
made 5 color coded samples.
- Yellow = Black Undercoat thinned, brushed on, then
blown off ("Compromise method" from previous post)
- Orange = White Vallejo Primer thinned, brushed on, then
blown off as above
- Red = White Vallejo Primer unthinned and brushed on
- Blue = Black Testors Model Master Acrylic thinned with
Testors Model Masters Universal Acrylic Thinner and applied with airbrush
- Green = White Vallejo Primer thinned and
applied with airbrush as above
I then conducted the first test. How much detail was "clogged". I used the black undercoat (Yellow sample) as my standard since this
is the level I am happy with. This is a subjective criteria and you can change this around to meet your standard as you see fit.
- Yellow = Standard/Acceptable
- Orange = Acceptable...slightly less than the standard. Appears to be extra build up of primer in deeper recesses. This shows up as whiter areas than the rest of the figure. It might be an optical illusion, but again was only slightly less than the standard.
- Red = Less than standard. As expected, the uncut primer did clog enough detail to be noticeable.
- Blue = Acceptable...in between the Orange and Yellow samples.
- Green = Acceptable...Very minor clogging of detail similar to Orange sample.
The next test was for the adhesion of the undercoat primer
to the model. I let the figures cure for 24 hours and then I rubbed the
helmet of each figure 5 times from front to rear with my finger using
approximately the same pressure (I didn't have a pressure gauge so EXACT
pressure is unknown).
Interesting result:
- Yellow = Could see bare metal on 4th pass
- Orange = Could see bare metal on 3rd pass
- Red = Primer showed no changed
- Blue = Undercoat showed no change
- Green = Primer/undercoat showed minor wear after 5th pass (Could begin seeing bare metal, but there was still a THIN coat of primer over it)
Next, I touched up the helmets on all the figures with an
undercoat of the type of procedure that was used to treat the figure. After that cured for 24 hours I painted the models exactly the
same...basecoat of Vallejo 830 Fieldgrau (1:1 ratio paint to water), dry for 2 hours,
shade of Vallejo 979 German Camo Dark Green (1:8 ratio paint to water), dry for 2 hours and then a
hi-light of Vallejo 886 Green Grey (1:5 ratio paint to water). After that dried for 2 hours I gloss varnished the figures with Testors Gloss Acryl varnish
and after 2 more hours I applied a flat matte finish using my airbrush of
Testors Flat Matte Acryl varnish thinned with Testors Model Masters Universal Acrylic Thinner.
Now I let the figures dry over night (roughly 7 hours)
and conducted Test 3. This test was to reflect the actual handling of models
and was the same rub test I used previously.
Very interesting results.
- Yellow = No wear after 5th pass
- Orange = Could see bare metal on 4th pass (Picture didn't come out)- Red = No wear after 5th pass
- Blue = No wear after 5th pass
- Green = No wear after 5th pass
Only the Orange sample showed wear. I think this has to do to the Primer being thinned with water and some adhesion properties are lost as a
result. The black undercoat whether airbrushed or brushed/blown on showed
no wear and looked as good as the Red sample (full primer).
The final test was another handling test and was to see
how the models withstood chipping.
I removed all the figures from the painting nails, painted their correct sample color on the underside of their base to maintain which sample was which, and placed the figures together in a box. I then shook the box "gently" for
15 seconds. Again no
precious measurement, but the shaking rhythm was the same for all 15 seconds (at least to the naked eye) and all the figures were exposed to the same environment at the same time.
I took the figures out and ALL of them showed significant
wear on the raised areas.
So, in Summary we have:
Conclusion: As long as you use a gloss varnish with Matte varnish on top of that, a Black undercoat whether airbrushed or brushed/blown off generates the same "protection" as a Primed model that has been gloss and matte varnished. Add to this detail on 15mm models that is preserved with an undercoat that I am looking for and I have my winner. The one thing that you should not do is thin your primer with water. That was a clear negative no matter how you look at it.
Again this is what I do....you need to experiment and find what
works best for you. But whatever
you do....you need to prime or undercoat the model!!!!
Don't go walking on bare ice!!!!!!
Subscribe to:
Posts (Atom)